I have had these pictures from my husband’s office party for a few years and just couldn’t figure out how I wanted to scrap them. Happily, inspiration struck as I was browsing through the fabulous products at The Robin’s Nest! Are you ready to do some layering?
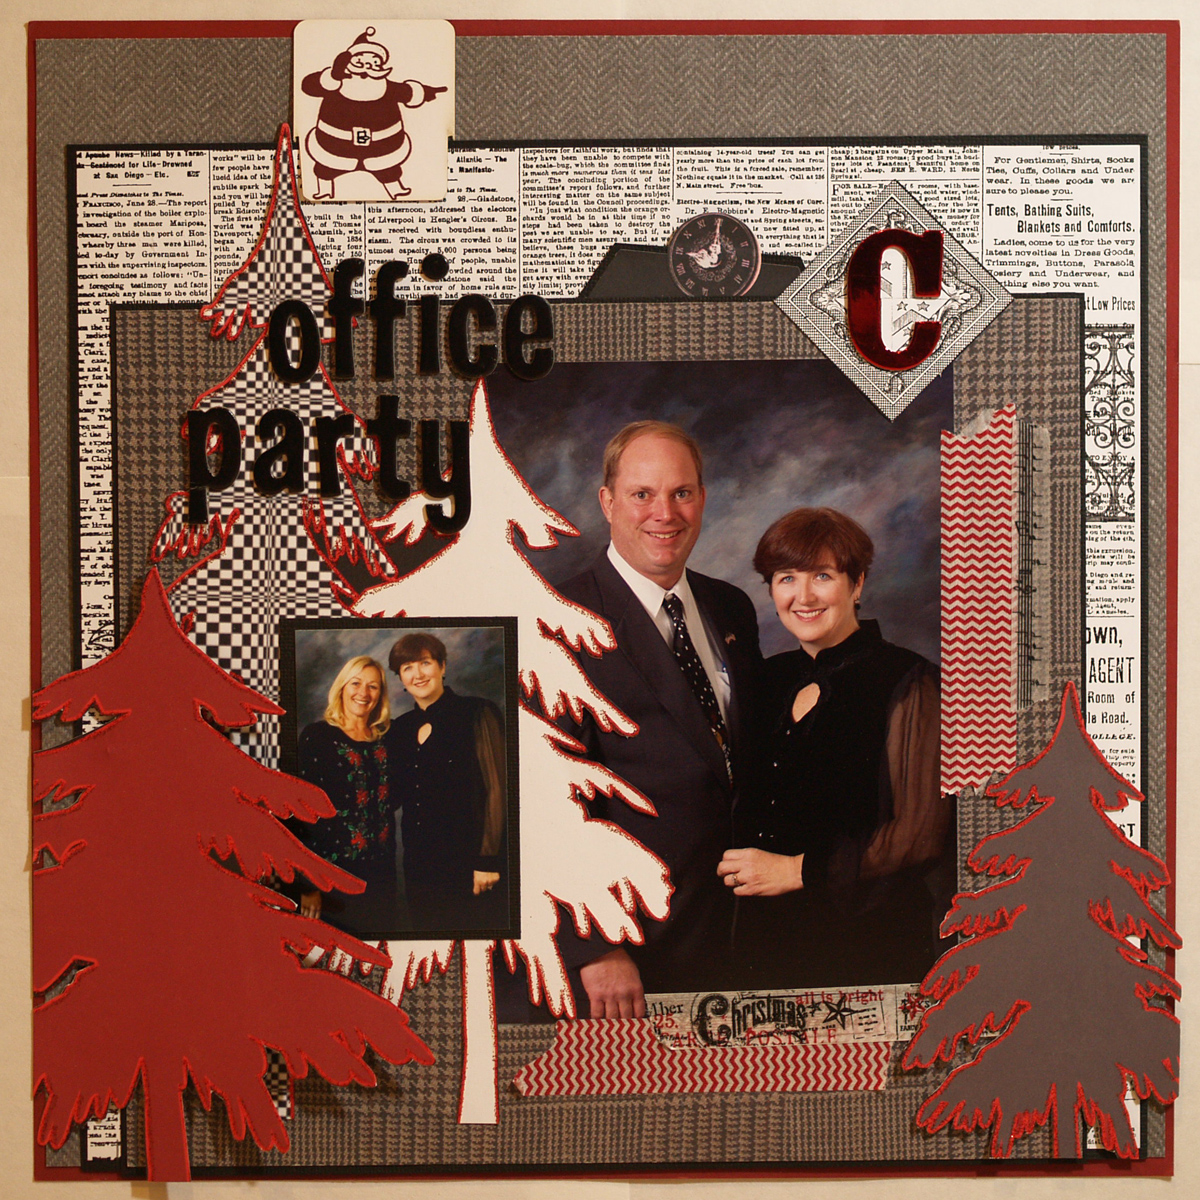
Here are the details if you would like to reproduce it for yourself:
1. I trimmed the Black Herringbone paper to an 11.75″ square and adhered it to a piece of the Chili Cardstock using the Best Glue Ever.
2. Next I worked with a piece of the Classified Cardstock. Using my craft knife I carefully cut around part of the diamond design on the upper right of the paper so I would be able to slide something underneath. I trimmed the paper to 11″ wide by 10.5″ tall, matted it with black cardstock, and adhered it about 1.25″ down from the top.
3. For the next layer I cut a piece of Mens Suit Stamp to 10″ wide by 9.5″ tall, added a mat of black cardstock and adhered it with The Best Glue Ever along the side and bottom edges only. You can see that I positioned it so that it slid under the diamond-shaped element I had already cut out.
4. Using the Classified Stickers and some black cardstock I created a tag which I slipped behind the previous layer, placing it next to the cut out.
5. I love, love, love the Glitter Christmas Tree paper so I fussy cut out each of the trees and had fun layering them with my pictures!
6. I added a few final details: A Santa Clippie in the upper left, a red foil letter “C” from my stash, a few bits of washi tape, and Thickers for the title.
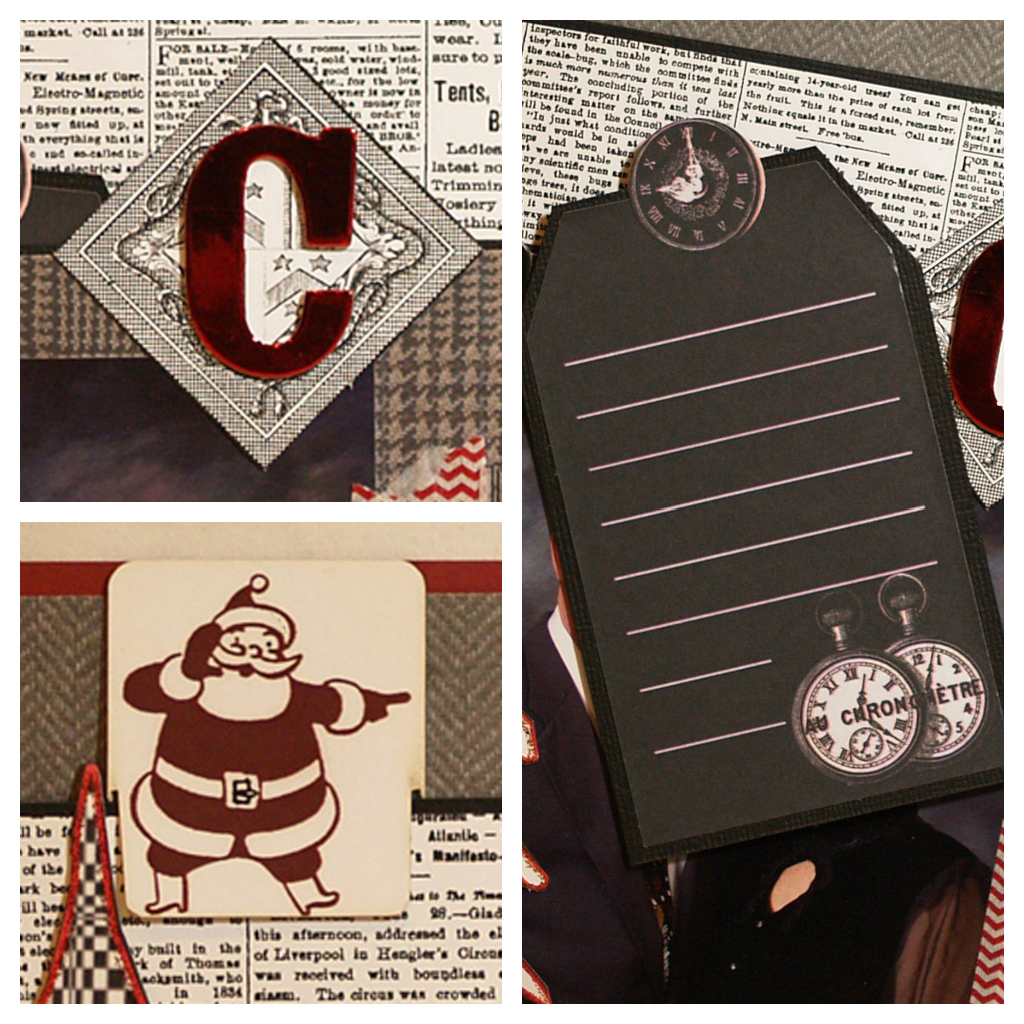
The Best Glue Ever did a wonderful job holding all these layers in place!
And here’s another tip: if you find the edges of your washi tape curling up as mine almost always does, just add a tiny drop of The Best Glue Ever – problem solved!
Using lots of layers and a striking color palette, I got the look I was
after…but I am not sure what to call it! What would you suggest?
Thanks for stopping by! Susie
