
ScraPerfect today. I am so excited to be sharing projects with you from my
craft room. I wanted to share a technique today using the ScraPerfect Foils.
lamination and pressure but ScraPerfect has some foils that can be used with
adhesives, not all foils work this way. And personally, I appreciated I
didn’t have to use any loud machines since my three small children were
sleeping while I crafted this entire project. No noise = sleeping children =
crafty time for mama. I call that a win!
 The technique I wanted to share is highlighting colored
images with foil. I love to color but sometimes I want to step my coloring up.
I’ve been known to add glitter brush pens and glossy accents but this is a
really neat and elegant way to step up your coloring game and have people saying
“how did they do that?”

I’ll start with what you need. First, an image. It honestly
doesn’t even need to be one you’ve colored. How about playing with an ephemera
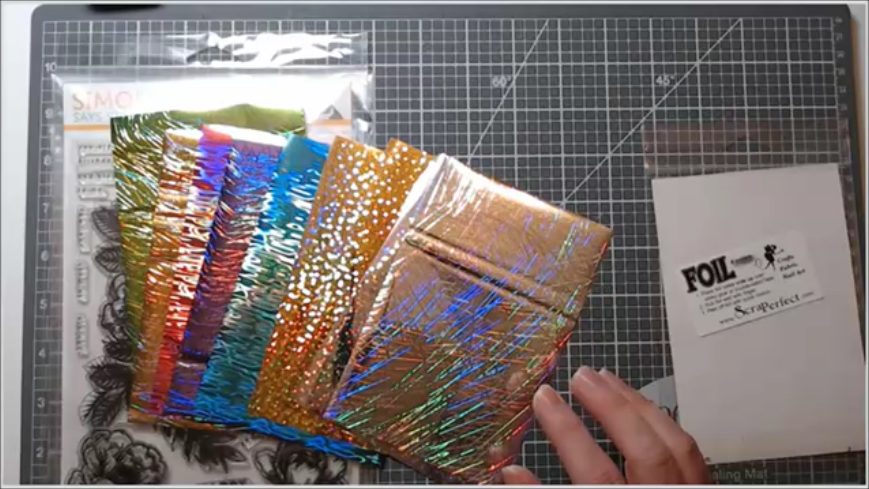
piece to add some extra special fun? I did start with a colored image. I also used BGE, a fine tip applicator and foils
from the 8 pack of foils.

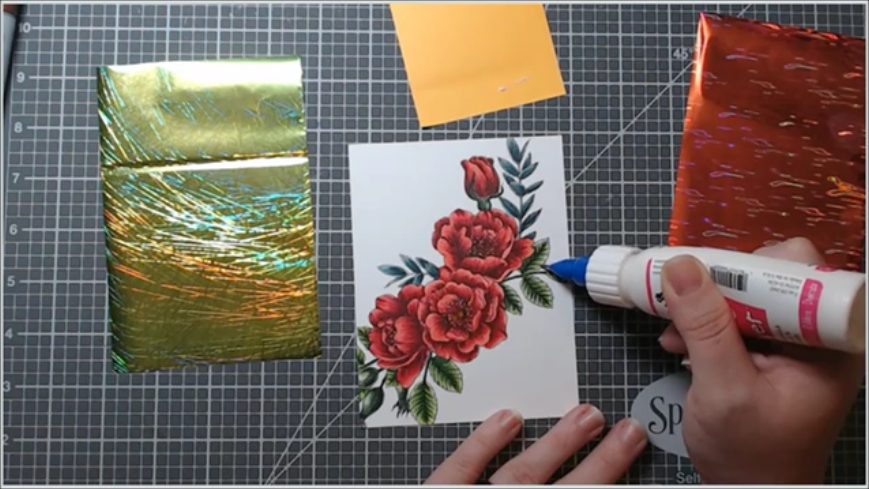
I then added Best Glue Ever using the
fine tip applicator to the edges of my colored leaves. Using the applicator
allowed me to get a really fine line of BGE in the right places to highlight my
coloring. I picked two foil colors to
highlight my image, they really coordinated nicely with my color combo.
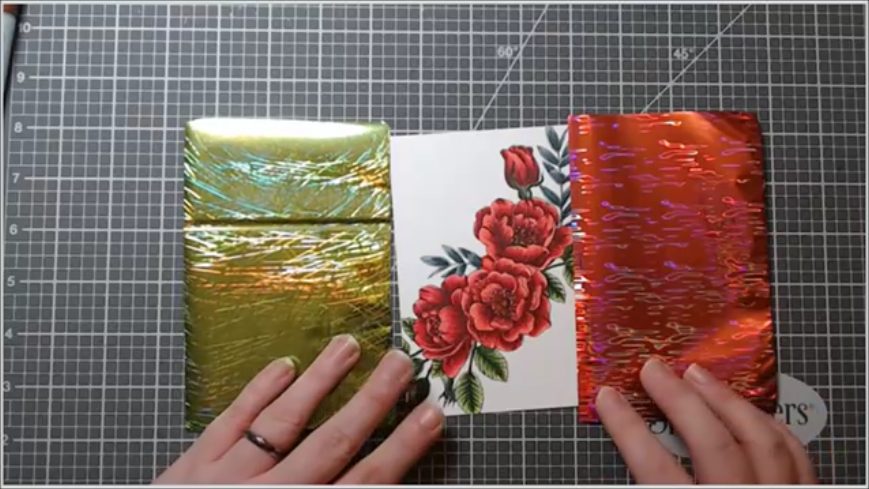 The colors in this pack of foils are gorgeous. They all have a different pattern to them. Some are like these two with the ripples and there are a few with stars.
bead of glue around all the larger leaves in my image I let the glue dry. It
turns clear. This is when it is ready to take the foil.
 I made sure to place the foil dull or under side down onto
my image. I look at this as the “adhesive” side of any foil. It is the part you
either adhere with adhesive or it is the adhesive depending on the method used
to adhere foil.
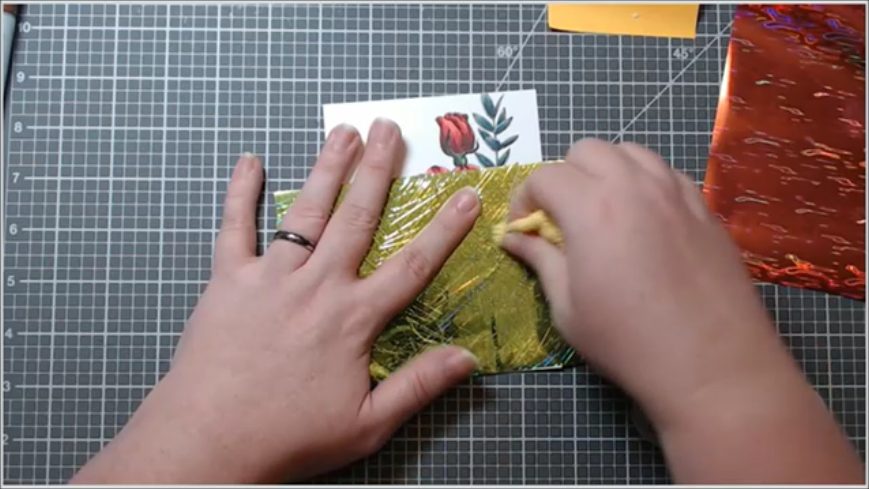
foil with my ScraPerfect cloth. I found it glided over the foil nicely and
allowed me to press the foil into all the places where I had applied the BGE. I’m
sure you could just wipe your finger over the foil and get an amazing result,
but I found the slick surface of the foil and the soft cloth to work best for
me.
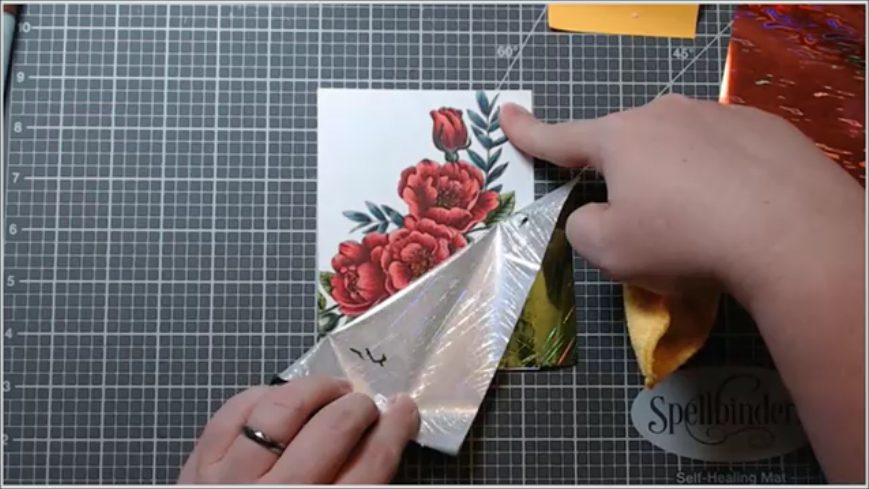
outline of the adhesive through the foil. I then carefully peeled back the
foil. I went nice and slowly when I did this. If there had places where the
foil did not adhere I could have rubbed on the top of the foil a little bit. I
didn’t have any issues with the foil not adhering.

underside to see where the foil was removed. There is a clear layer on top of
the foil that remains intact but the foil itself is attached to my card.

edges of the pedals by applying a thin bead of BGE to them.

next step. When the BGE is clear it is sort of tacky. This is how it will stick
to the foil.
surface. Making sure to take a little extra time since there were more places I
wanted foiled on the flowers vs the leaves.

shows where the foil is adhered to the adhesive.

with how this worked without heat or running it through any machine to apply
pressure. Like I said before, no noise in my house equals my kids staying
asleep and me getting some much needed crafting time.

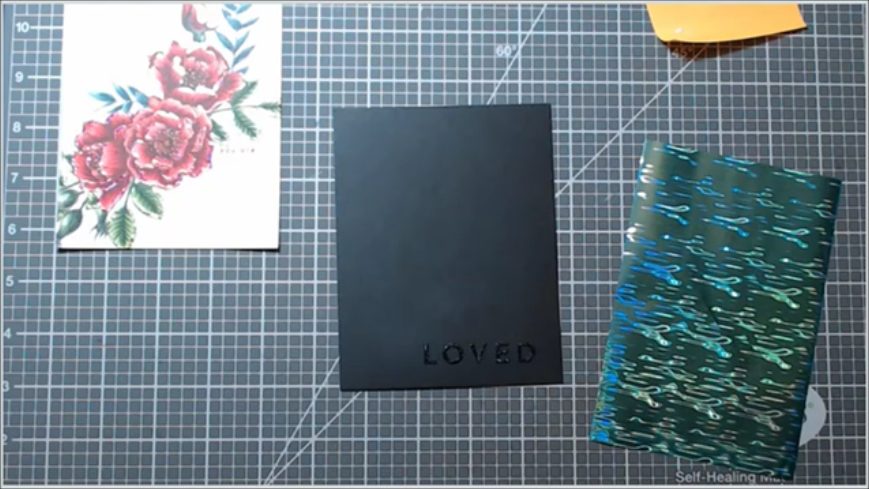
After my flowers and leaves were foiled I couldn’t decide
how I was going to add a sentiment. I didn’t want to heat emboss the sentiment
because I felt like it wouldn’t have the same “feel” as the foiled floral
image. So I heat embossed this outline sentiment from the same stamp set onto
some black cardstock with clear embossing powder. Then I filled in the letters
with BGE.
leaves I colored in the image so nicely. I decided to use it. Again, once the
BGE was clear and tacky I placed the dull/ silver side of the foil down on my
sentiment and rubbed it with the ScraPerfect Perfect Cleaning Cloth. I ended up with a beautifully foiled
sentiment that coordinated perfectly in sheen and color!
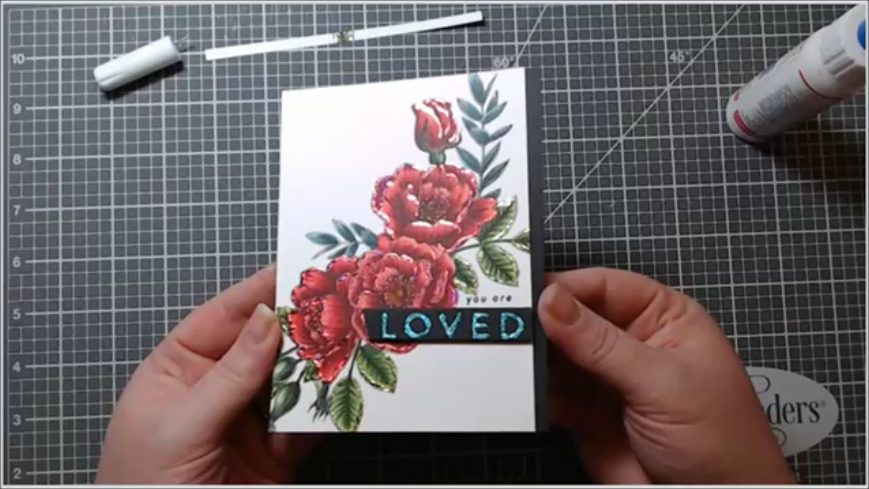
strip of black cardstock and the remaining part of the sentiment stamped right
on the image panel.
worked for you and share your tips or tricks for beautiful foiled images or
designs. I can see so many uses for this foil and plan to try many more in the
future. Hopefully you’ve been inspired.

