
A gorgeous project from GUEST DESIGNER, Charity Hotrum…using ScraPerfect’s Best Glue Ever!
Keep this in mind for any holiday or make it smaller an use a chipboard circle and use it on a card!
Charity here from Scrappin’ Chaos. From copper detail, stained glass hearts to volumes of love letters,
we heart it up for the month of February. This years addition to our decor alternatives is garnished with
Robin’s Nest products. Glittering chipboard, choice bits of high quality paper, and
dew drop encrusted wood shapes are wrapped with shiny silver trim.
~ Layered Love Wreath ~

The cones were constructed from 2.5″x2″ rectangles of paper, cut out with pinking sheers.

Because of it’s sheer nature, vellum is notoriously difficult to adhere
without leaving oily smears and unsightly globs of glue.
I was thrilled to discover that Scraperfect’s Best Glue Ever turned my
rectangles of drafter’s vellum into perfect cones with no fuss or mess.

To arrange the cones evenly I began by placing one at each of the clock stations.
I then filled in the remaining spaces, lining up the narrow tips around a 2″ circle.

I added a ring of hot glue on the inside of the hoop for an additional layer of security.

To set the Love Day tone I prepped layers of valentine themed accessories for the wreath.
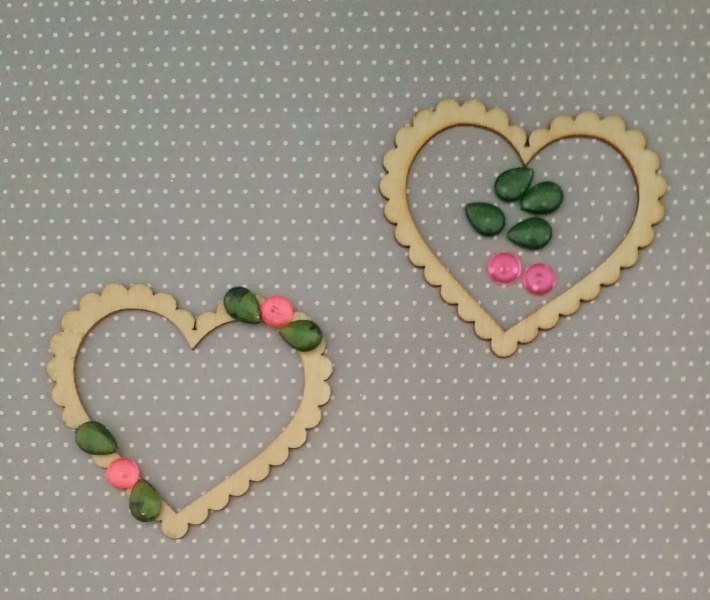
I glued Green Tear Drops and Neon Pink Dew Drops to a wood heart shape to mimic roses.
I also cut a rose from the Silver Roses Glitter Cardstock.

I wound Silver Straw trim around scraps of Wedding Cut Outs Cardstock and Rosy Cards.
I added a wood heart frame to the corner with a heart and crown
punched from more Robin’s Nest Paper scraps.

The red medallion is a 12″x2″ strip of Red Glitter Paisley cardstock,
scored and folded every 1/2″ and formed into a rosette.
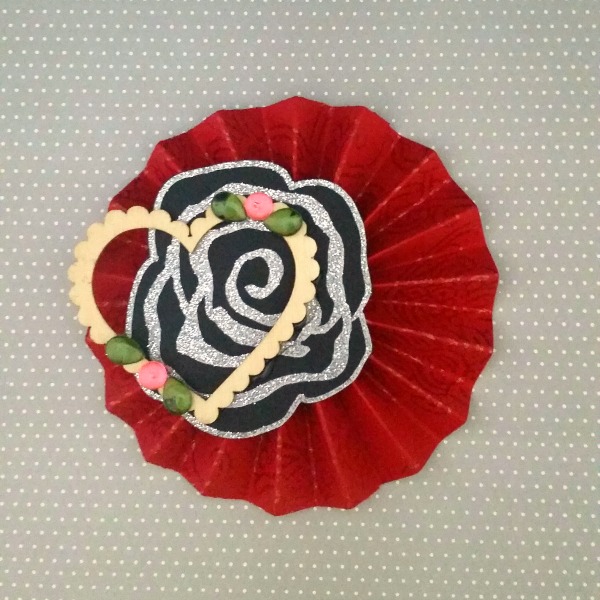
I glued the silver rose onto the medallion, just west of center then added
the be-dewed heart so the edge was flush with the medallion.

I slipped the edge of the layered papers under the leaves on the wood heart
and adhered them securely to the rose and the medallion.
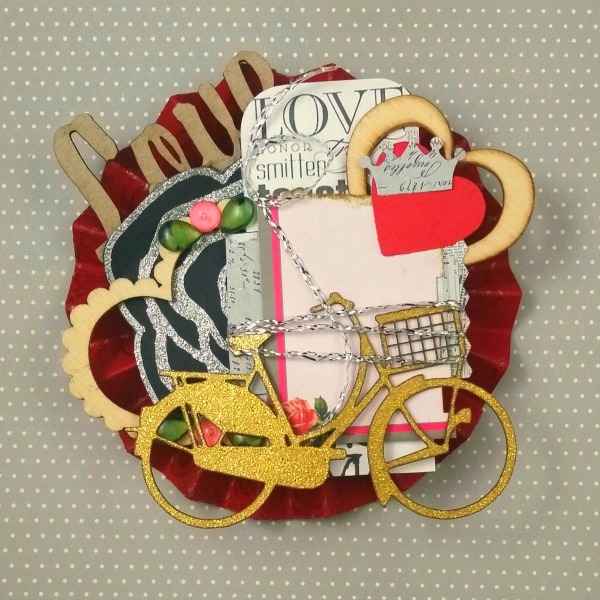
I slipped the Gold Chipboard Bike under the Silver Straw
and a laser cut “LOVE” behind the silver rose.
Finally the medallion was ready to adhere to the wreath.

This mini wreath is only 8″ in diameter, but it is a power house of
roses, hearts, and glitter, layered over vellum cones.
What’s not to love!

Check my blog Scrappin’ Chaos for a list of Supplies.
Scrap On!
~charity~

