Hey Friends,
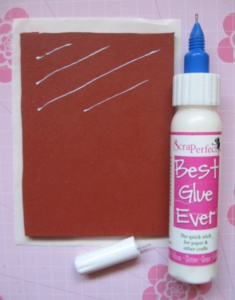
It’s Karen here and I can’t wait to show you how ScraPerfect helped me adhere an un-mounted stamp to an acrylic block effortlessly. The best news is that it is a much more cost effective alternative than the traditional method of mounting stamps using sheets of expensive self-adhesive cling foam. You save time because you no longer have to struggle to cut them out and then frequently stop to clean your scissors from the sticky residue build up. Also, it is more convenient than trying to use double sided adhesive or a glue stick to temporarily attach an un-mounted stamp. Therefore, if you have a collection of un-mounted stamps that have been sitting in a drawer unused and neglected, then the Best Glue Ever is the perfect solution.
![]()
Directions:
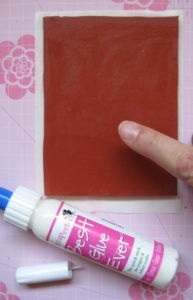
1. Apply BGE to the back of an un-mounted rubber stamp. Use glue sparingly as a little does go a long way. The photos below shows the amount of glue needed to cover half of the area. Quickly use your finger to spread a thin coat over the surface and set aside to dry. The glue will dry in 2-3 minutes and will turn clear and tacky. Then place the stamp onto an acrylic block. After stamping the images, remove the stamp and return it to a sheet of acetate or release paper. There is no need to clean off the glue as the tackiness is an extra benefit that allows you to effectively store your un-mounted stamps.
(TIP: Another way to attach stamps to acrylic blocks is to apply the thin coat of BGE directly to the acrylic block instead. Therefore, you use less glue as you don’t have to treat the back of every rubber stamp in your stash.)
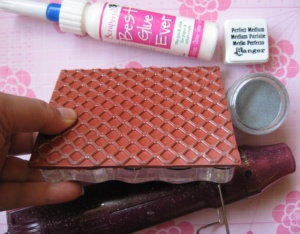
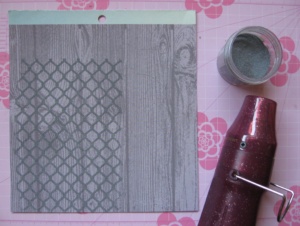
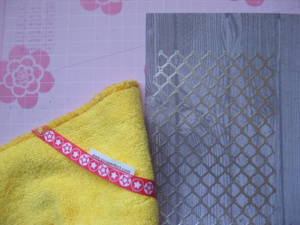
2. Use the Perfect Crafting Pouch to wipe over the pattern paper that the stamping & embossing will be added to. Load the stamp with watermark ink and apply to paper. Next, cover with silver embossing powder, collect the excess, and heat set. For easy clean up of stay particles of embossing powder from your project or work surface, use the Perfect Cleaning Cloth.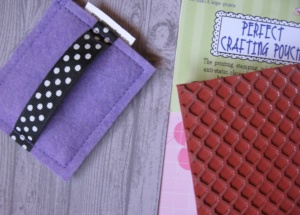
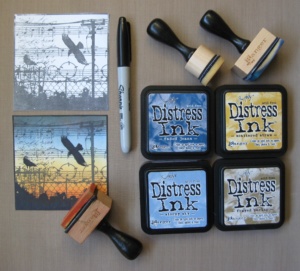
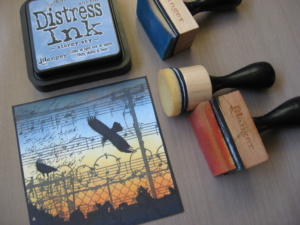
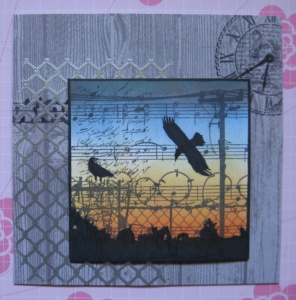
3. Stamp the urban image onto white cardstock with black ink. Use ink blending tools to add layers of color to create the sunset skyline. Begin inking at the outer edge with the darkest colors and blend in towards the middle fading to the lightest shade. Take a permanent black marker and add defining details to the images that you want to stand out. Finally, darken the border edge.
4. Adhere the embossed background paper to a card base. (6×6″) Stamp additional images going off the edge of the card with black ink. Next, attach the urban image to the center of the card using foam tape.
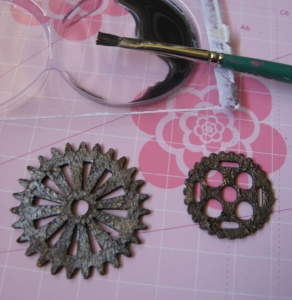
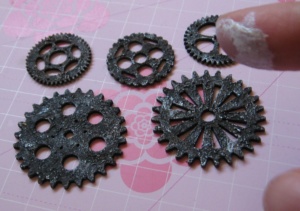
5. Coat the chipboard gears with a thick layer of texture paste. Tap the brush vertically on the wet texture paste so the bristles create peaks and valleys in the paste. (As, I only had gold texture paste I added an additional step of painting over it with silver acrylic paint.) Next, make a black watercolor wash so that the diluted black paint sinks into all the valleys making the texture more pronounced. Apply, a thin coating of grey paint to your finger and lightly tap your finger on the gear so that the peaks of texture paste pick up tiny highlights of grey paint creating additional dimension.
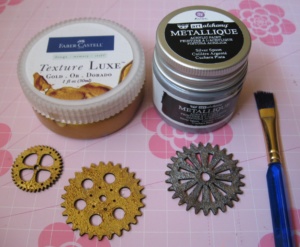
(TIP: Allow the paint to dry thoroughly before applying the next layer.)
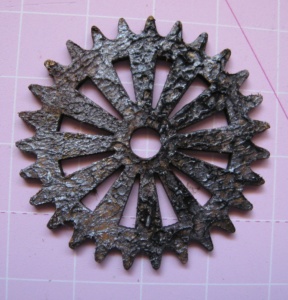
R half – black watercolor applied Apply grey paint with your finger to add highlights.
6. Apply BGE to the back of the gears and adhere them in three clusters. Next, stamp and fussy cut smaller embellishments to add to the scene. (screw, nut, highway sign, clock)
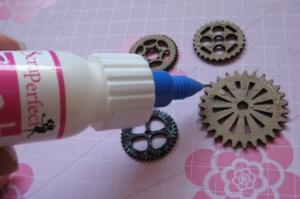
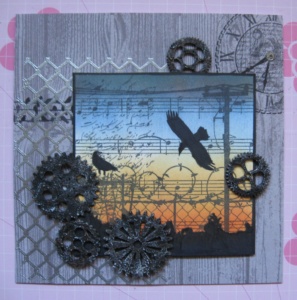
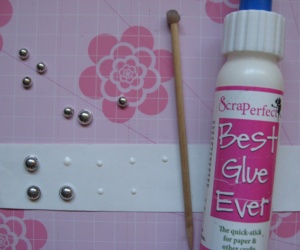
7. Use BGE to create the perfect size glue dots to attach odd shaped embellishments. Lastly, adhere some silver dome gems to enhance the gears. For ease and accuracy, use the Embellie Gellie to easily select and transport them into position.
Best Glue Ever Embellie-Gellie No Clog Writing Caps
![]()
Other Supplies:
woodgrain paper, white cardstock
embossing powder (silver & black) / heat gun
rubber stamps -Urban Scene Silhouette, Chain Link Fence & Clocks, Screw & Nut (Blank Page Muse)
Ink Pad (black, watermark) / Distress Ink Pads (yellow, orange, teal, blue)
ink blending tools / paint brush
texture paint / acrylic paint (black brown, silver, copper)
chipboard gears (Creative Embellishments)
Silver Dew Drop Gems (The Robin’s Nest)