
Hello ScraPerfect Friends Chelsea here to share a project inspiration that comes from my love of paper crafting, and my love for making homemade jewelry. For me I find myself dipping into all areas of arts when creating a project so its not unusual for me to mix art forms together! Makes it all more creative!
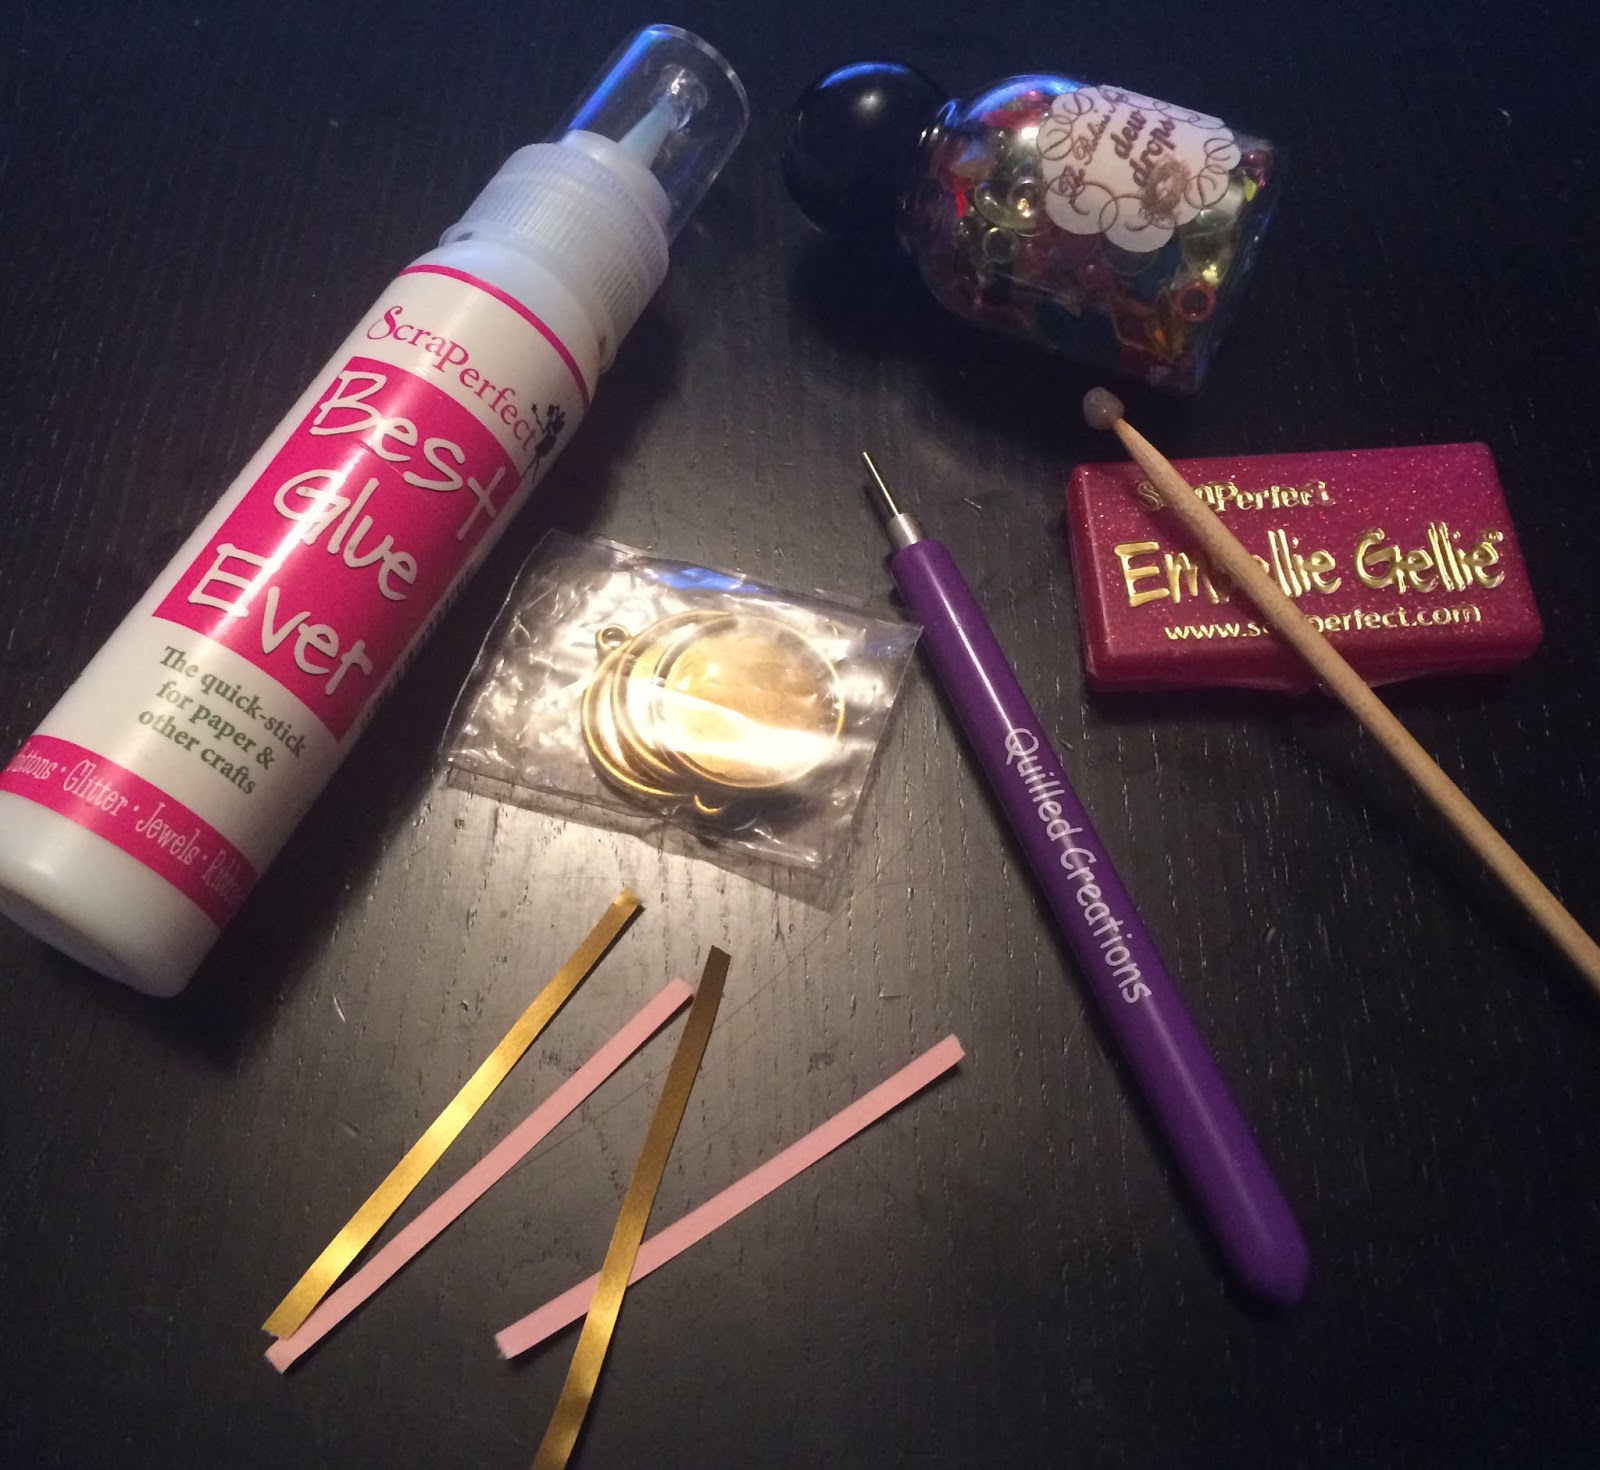
The supplies for this project are as follows :
2 Colors of 1/8 ” of Quilling Paper (pre-cut, or cut your own out of your favorite paper)
Quilling Tool
Dew Drops by Robin’s Nest or Gems
1″ Circle Bezel

Traditionally when quilling you would wrap your strips of paper around your quilling tool first, and release the paper coil , and then apply your glue. I have used every glue under the sun for quilling and nothing compares to the BGE. My tip is applying the glue first at one end of the paper strip and let dry clear before beginning to roll it around my quilling tool. This allows me not to have to squish my coil, or get glue all over my hands while trying to hold the tiny coils in my fingers. I also do alot of freestyle quilling verse following a pattern so the tip of apply the glue first only applies if your free-styling your paper coils compared to using a quilling board and measuring your coils
Let jump in and create!
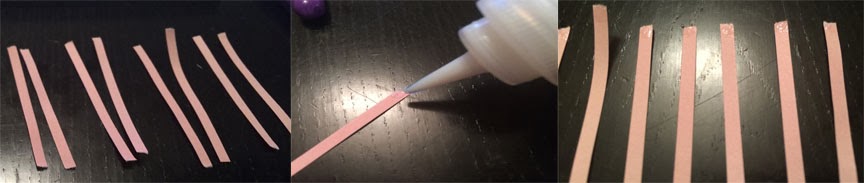
Step 1: Pre-cut your strips ; 1.5″ in length 17 for the border, and 7 for the flower pedals. Don’t use scissors, but rip your paper. This will allow a clean and invisible seam. Dab a drop of BGE on one end of the quilling paper. Spread the thin layer of BEG so that it isn’t a big drop. The glue will turn clear (tacky) in just a few moments. I like to prepare all my quilling strips with glue first so that it is easier to make the coils one after another.
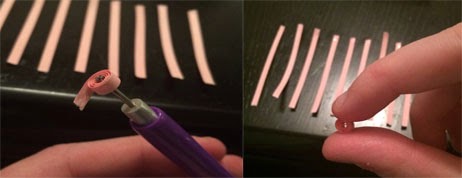
Step 2 : Creating the flower petals. Roll your quilling paper around the quilling tool tightly. *TIP : rolling towards you allows you to align your paper evenly as you roll*. Once you reach the other end where the glue is gently let go for it to coil open ; removed from tool gently. Seal the piece with the glued end. *TIP: Rolling the coil between your fingers allows for a seamless seal finish.* Continue coiling each of the petal papers.
Step 3 : Create tear drops with each of your coiled petals by pinching one side of your coil.
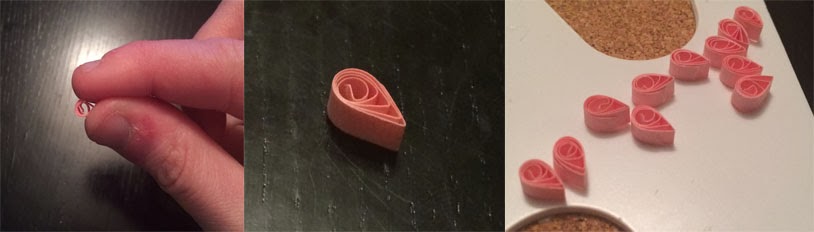
Step 4 : Creating the edging. Follow Step 3 until your reach glue, instead of removing your quilled paper from the tool continue rolling to seal the glued edge. Remove from tool.

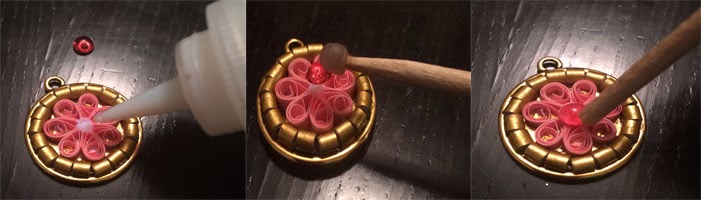
Step 5 : Place a thin even line of glue all the way around the inside edge of the bezel. Using Embellie Gellie, pick up the edge rounds one at time, placing the seam edge downwards onto the glue. Continue all the way around your bezel edge. Set it aside to dry clear.

Step 6 : Creating the flower. Begin by placing a dab of glue on the seam edge of one of the tear drops, let dry clear, and attach another tear drop petal ; seam to seam. (This allow a clean finish and you don’t see the seamed (glued) edges. Attach 6 of the 7 tear drops together leaving a space for the 7th to be added once its placed inside the bezel.

Step 7 : Apply a thin layer of glue in the middle of your bezel, allow to dry clear. Place your 6 petels inside the bezel ensuring a space big enough to insert your 7th petal. Once positioned add your 7th petal.

Step 8 : Add a dab of glue to the center of the flower and let dry clear. Using Embellie Gellie pick up a dew drop (or gem) and place it on the center of the flower to finish off your flower. Use the back of the Embellie Gellie to press the dew drop / gem into the glue.

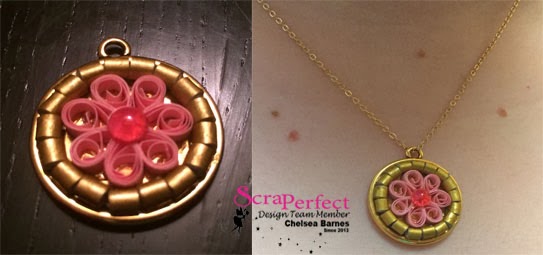
Your project is now complete! There are many uses for this: wear as a pendant; attach to a card/scrapbook page; create a bookmark… the possibilities are endless. Remember if your planning to create this to wear , it is paper so keep away from water! A different spin on two classic art forms. Enjoy!

Don’t forget to share your projects with us on Facebook! We love to see how you take our daily tutorials!

