
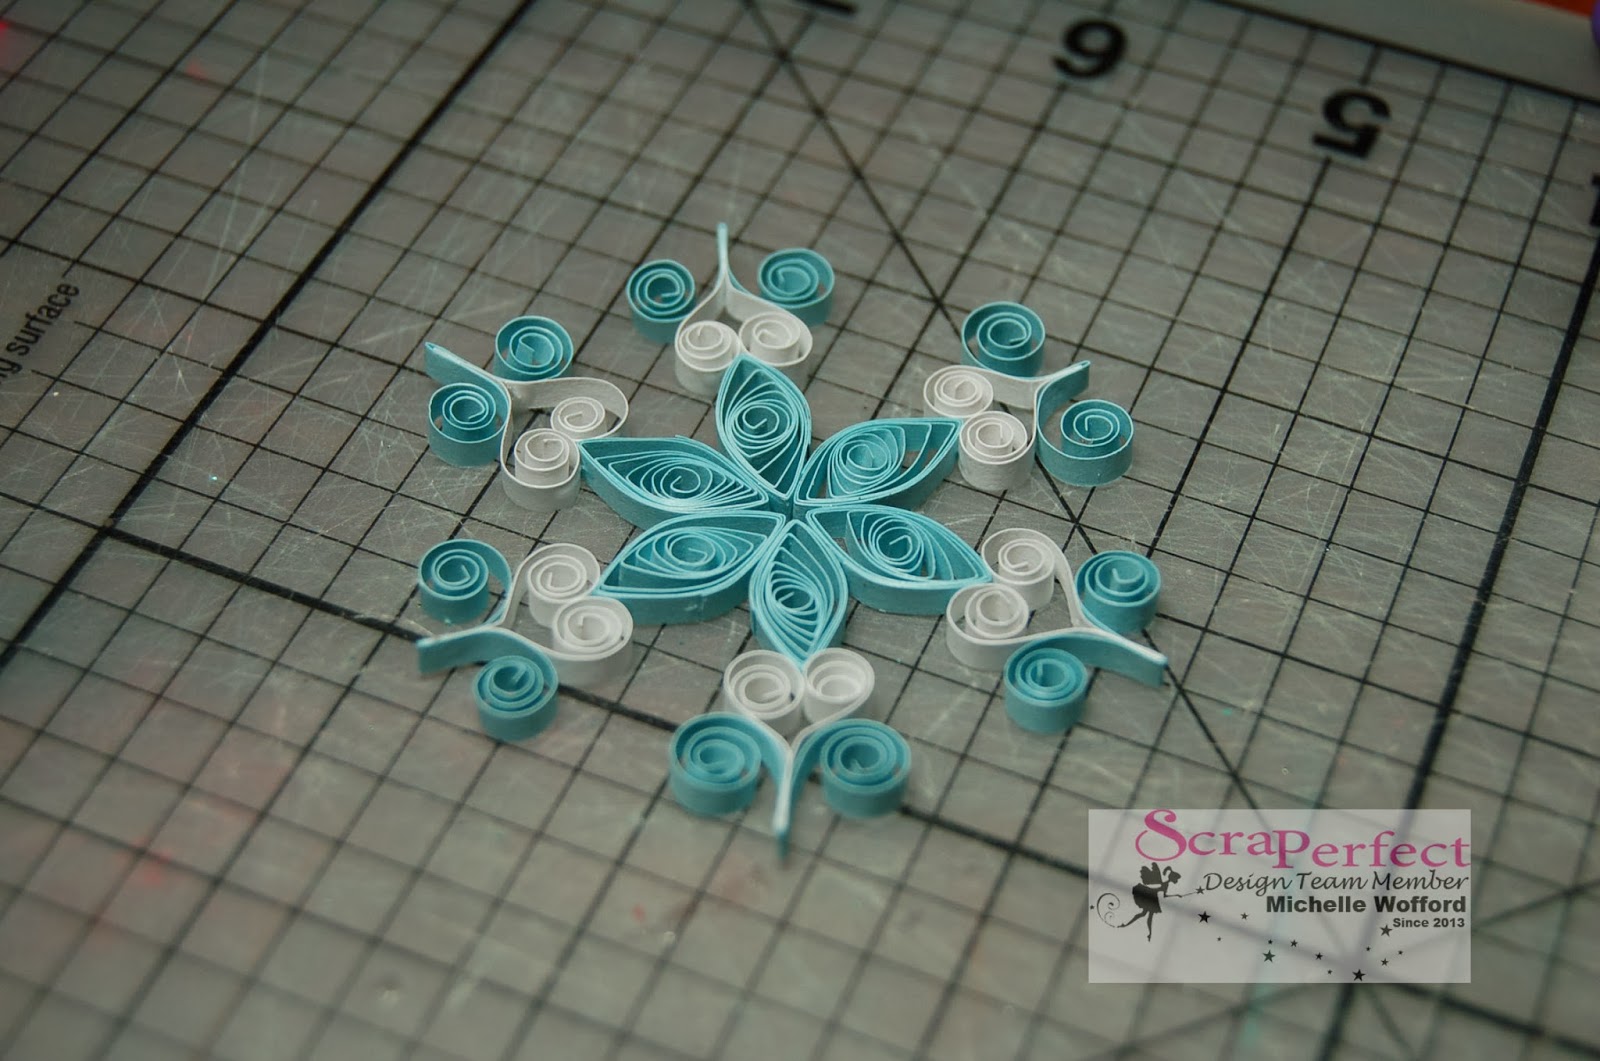
Michelle here to share a project featuring how to make a beautiful quilled snowflake. The fine tip on the Best Glue Ever is great for quilling projects and it dries quickly and clear.
For this tutorial I had the No-Clog Writing Cap on my bottle of the Best Glue Ever, it works great but the normal tip on is also great for quilling.

Once you have your pieces formed use apply a little dab of the Best Glue Ever to the open edge and seal the piece. Repeat with all pieces, allow the glue to dry for a couple minutes then shape as needed.
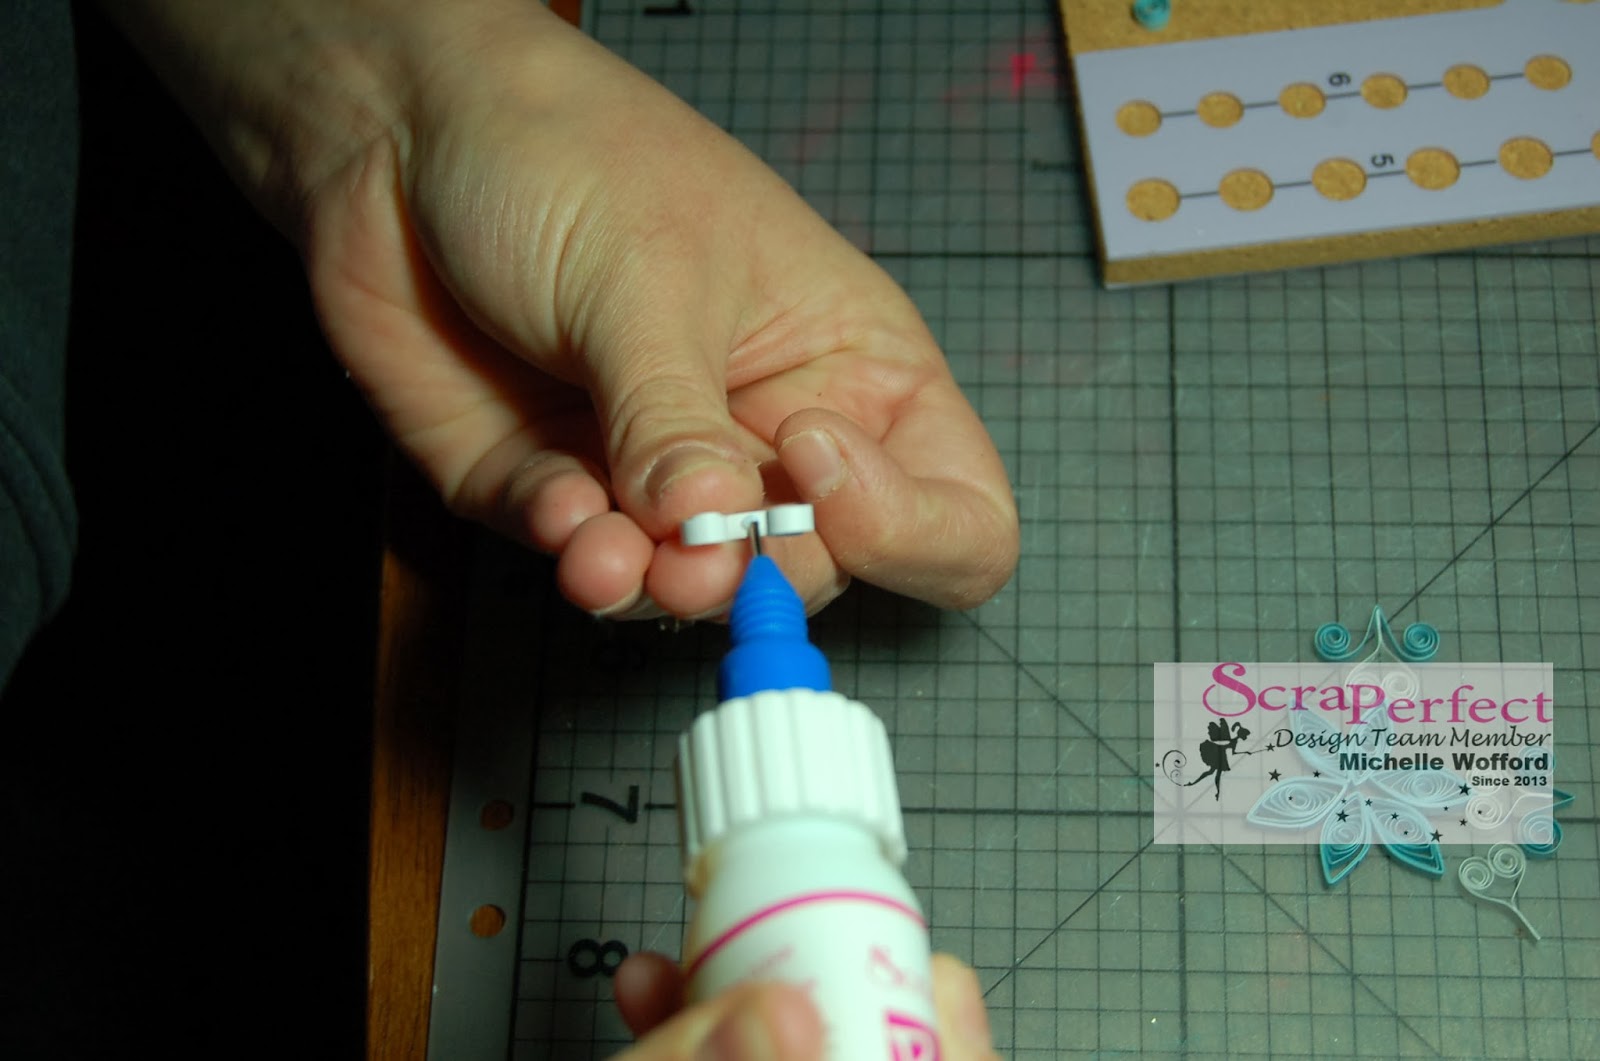

To create the look of this snowflake I created white heart shapes and glued and pinched the bottoms so there is a long point on the bottom. The long fine tip on the No-clog Writing Cap is perfect for getting glue in to small tight areas like this.

Now use the Best Glue Ever to adhere all the pieces together to create the snowflake.

Use a few spots of glue on the back side of the snowflake and attach it an acrylic card for a fun winter card.
ScraPerfect products used
Thanks for looking!
Michelle

