Hello everyone! Kim L. here today for ScraPerfect to share with you an altered envelope that I created. I am continuing to work on junk journals, and these are great embellishments to use in them. The current batch I am creating are shabby chic, I hope you like this one:

Here are the instructions on how to make one of these simple, sweet, shabby envelopes:
1. Gather up one 12 x 12 piece of printed card stick, 1 mailing envelope, scissors, a paper doily, a small swatch of fabric and piece of coordinating ribbon, some sequin trim, fringe trim, a couple of coordinating appliques, a button, some pearls, and a couple of yo yos if you have them, and your bottle of the Best Glue Ever with the large No Clog Writing Cap on it. Yes, this is the only adhesive you will need for paper, fabric, ribbon, lace, buttons, and pearls!
2. Apply small dots of the Best Glue Ever to the front of your envelope and the flap. Attach the paper to the envelope and cut off the excess. Repeat this process with the back of the envelope.
3. On the bottom front of your envelope, put down a thin line of the Best Glue Ever and then place your sequin trim over it and gently press down to secure. On the top left hand corner put down small dots of the Best Glue Ever in a square, put down your piece of fabric and gently press down to secure. Repeat the process with the lace applique, the ribbon bow, and button.
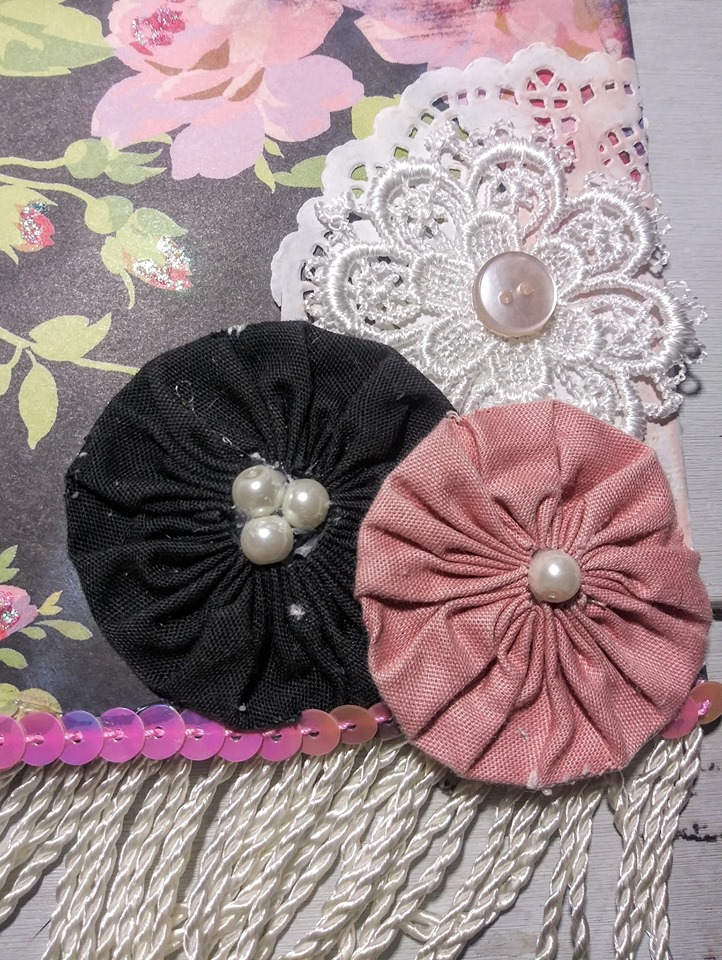
4.Put tiny dots of the Best Glue Ever on the back of a paper doily and secure to your envelope.
Make large glue dots from the Best Glue Ever on the back of your yo yos and applique, wait a minute or two for them to cure by turning clear, and attach them to your envelope. Then put a medium sized glue dot in the middle of your yo yos, and place pearls in the center. Wait until the pearls are attached before moving on to the back of the envelope.
5. On the back of your envelope, put 2 small lines of the Best Glue Ever along the bottom edge of the envelope. Place the fringe trim on and put it so the front of the trim will be seen on the front side of your envelope. Put a medium sized glue dot of the Best Glue Ever on the point on the flap, then place your button down and you have made your shabby envelope. It’s that simple!
Here is a closer look at the details and the back of my envelope:


I think these envelopes are a great way to store little tickets, receipts, or lists in your junk journals and I hope you will try to make some too! Thanks so much for stopping by today, please follow
ScraPerfect on social media and subscribe to this blog! To see more of my work, please check out and subscribe to my blog, Vintage Rose Creations By Kim. See you back again next month!
Happy Crafting,
Kim Lippincott