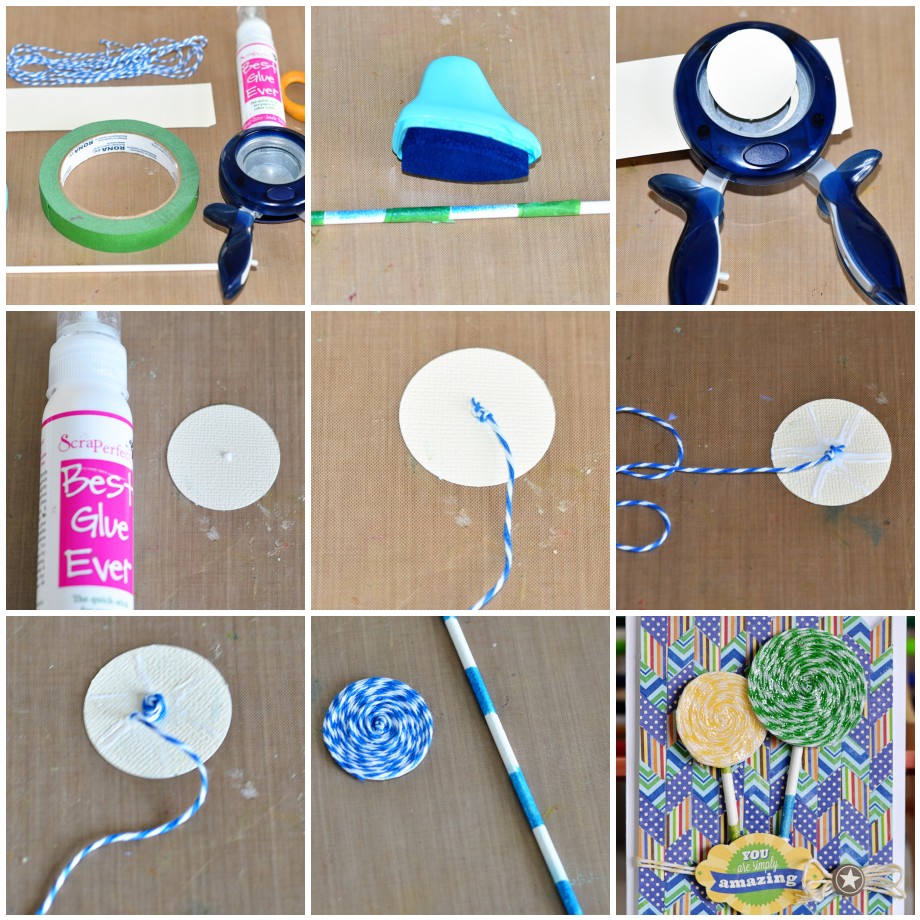
HI everyone! Dani Donner here to share with you a quick tutorial on how I created my twine lollipops featured in this card:
Here is what you will need:
– Paper Lollipop Stick (you can even find them at Walmart)
– Twine
– Cardstock (anycolor)
– Circle punch
– Painters tape (nothing fancy, the regular cheap one)
– Chalk Ink
– Best Glue Ever
Step 1:
– Cover parts of your paper stick with painters tape and cover everything with chalk ink, let it dry a little.
Step 2:
– Cut a cardstock circle.
Step 3:
– Put a tiny drop of Best Glue Ever in the center of the punched circle. Best Glue Ever is so AMAZING you don’t need more than that to hold!
Step 4:
– Make a knot on one end of your twine and glue it down in the center of the circle.
Step 5:
– Add thin glue strips all around the circle, starting from the center until the edges. Those will hold the twine down beautiully.
Step 6:
– Press the twine around the knot following the circle shape.
Step 7:
– Cut the tip of the twine once you have covered your entire cardstock. Add a final drop of glue to hold the tip down. Remove the painter’s tape from the stick and you can assemble your lollipop!
Easy right? I hope you have enjoyed this tutorial, and you will see that those twine circles are highly addictive, specially when you have something like Best Glue Ever to speed up the process and make your life so much easier.
See you soon!
Dani Donner


