
A picture is worth a thousand words, but a video lets you listen and watch! Step-by-step instructions are below, if you prefer to read.
ScraPerfect Best Glue Ever™
ScraPerfect Embellie Gellie™
Pre-made card to alter OR folded cardstock (4.25” x 5.5” or any size)
Scraps of patterned paper in three colors cut into 3 “hat-shaped” triangles
Scraps of solid cardstock in three colors coordinating with the patterned paper
white cardstock
Computer & Printer OR Stamps OR Markers
vellum (Optional)
Choose: buttons, glitter, confetti, paper punch, flowers, stickers, chipboard, brad…
Tip: Read the TIPS before proceeding:)
Steps
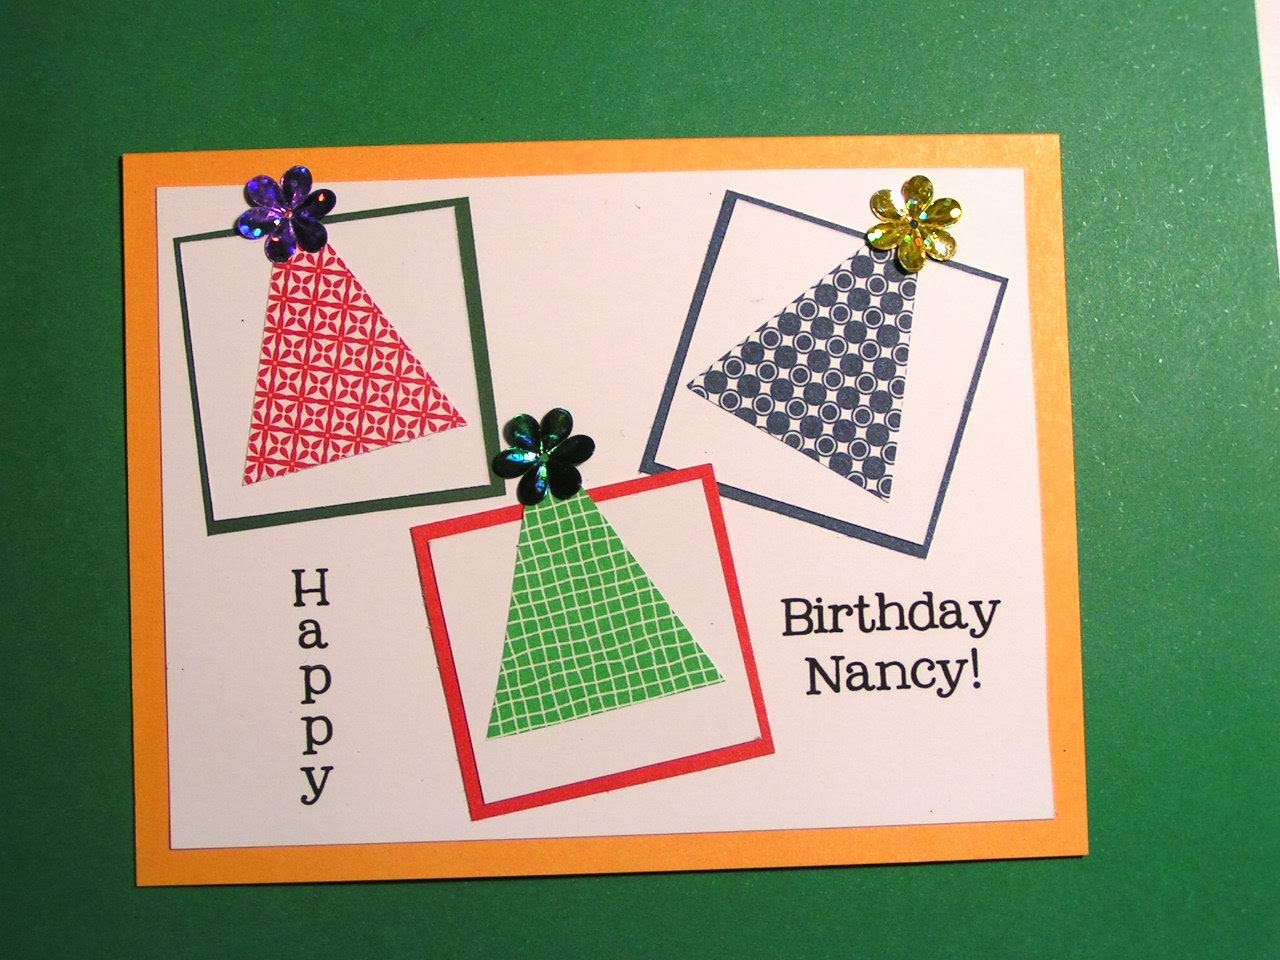
Step 1: Hat squares
Cut solid cardstock 3 squares approx. 1.5” on a side or to fit card size
Cut white cardstock 1/8” smaller than the solid colored squares and glue to each solid cardstock square.
Glue hat-shaped triangles onto squares at slightly crooked and overlapping the edge of the squares. (See finished card)

Step 2: Set up word processor for card’s message
This step is hard to describe but not nearly so hard to do!
Cut white cardstock rectangle 1/8” smaller on all sides than the card.
Place squares onto white cardstock rectangle in a pleasing arrangement. Decide where words will fit.
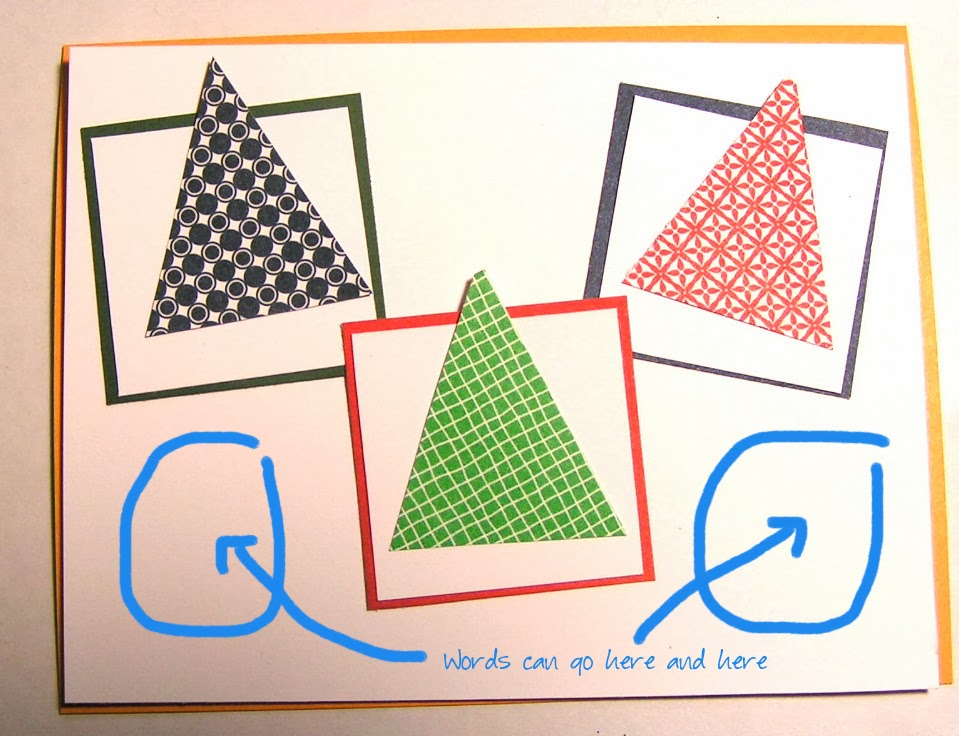
With word processing software, use text boxes to write the message “Happy Birthday, Nancy” (or whatever you want to say!). Move the text boxes until you think they are the correct distance apart and spaced correctly vertical/horizontally to fit onto the card. Print a draft.
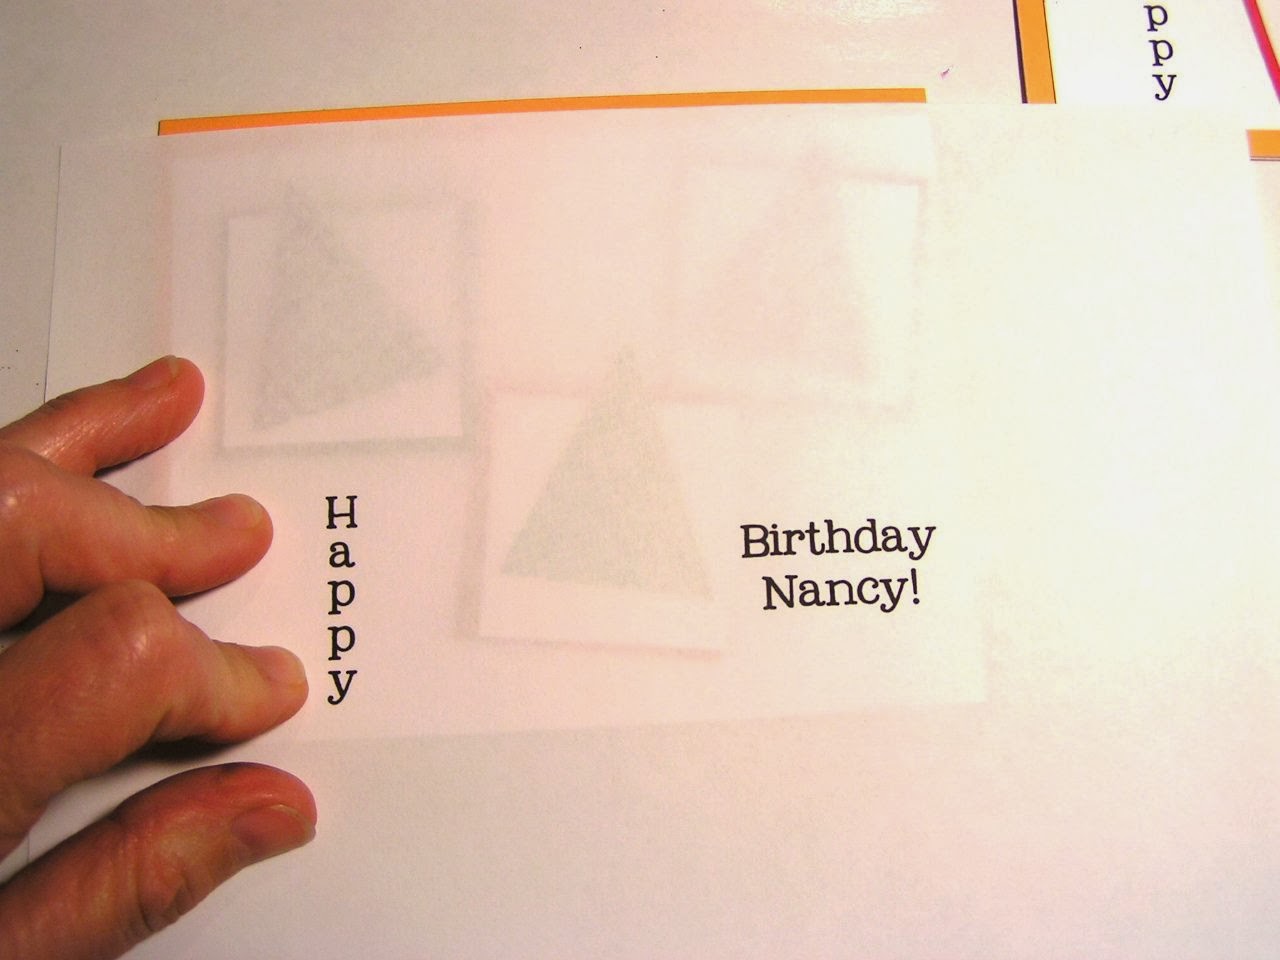
Place the draft printing on top of the card and look through it like tracing paper to check alignment and position of the words.
Move the text boxes as necessary, printing drafts until the
words are arranged correctly. Mark the placement of the white card onto
the printer paper. (I used little pencil marks on the lower corners…)

Step 3: Print message onto card
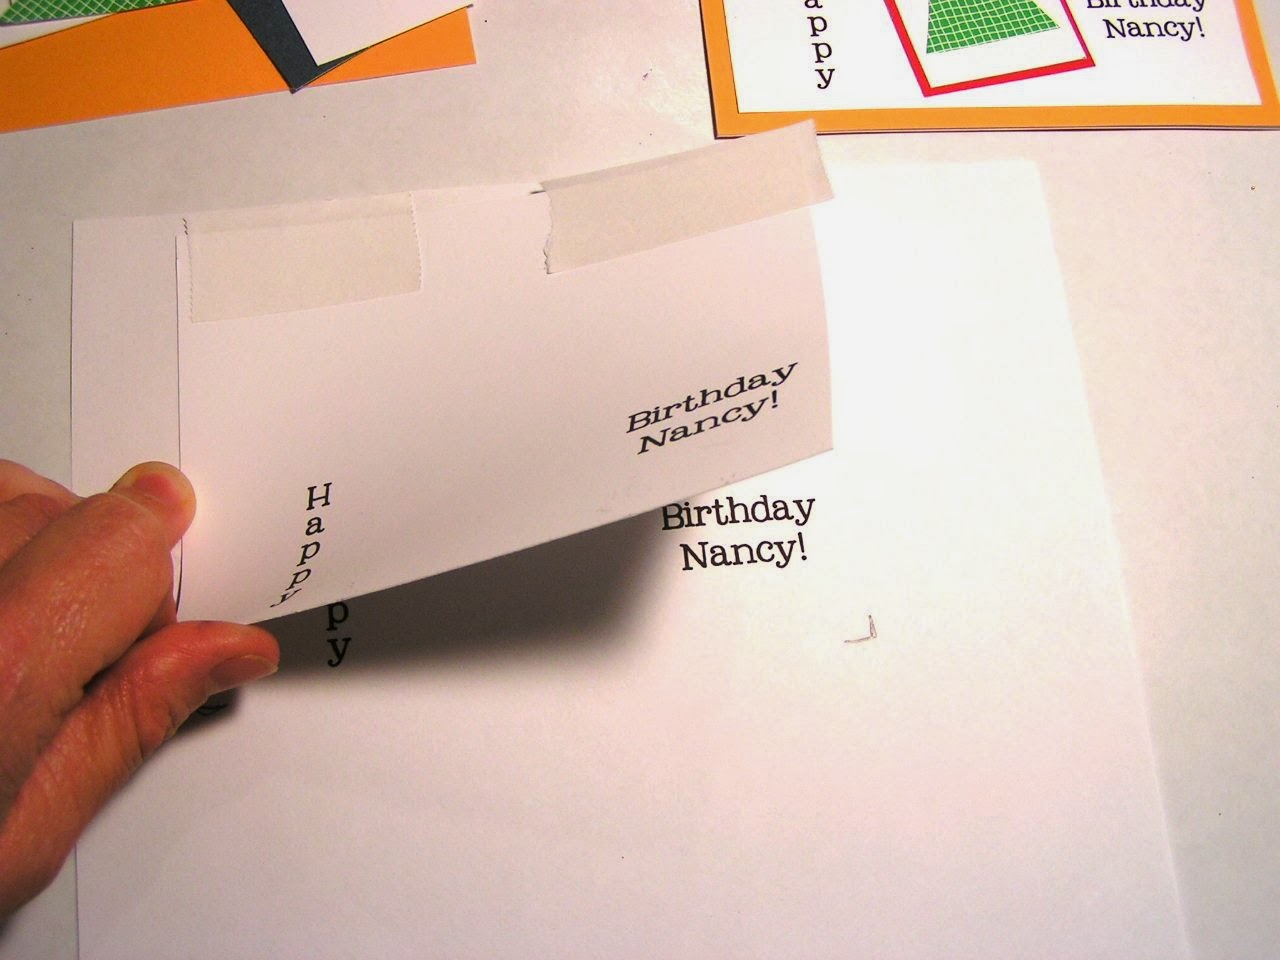
Use painter’s or Washi tape to temporarily adhere the white rectangle onto the printer paper at the correct location, using the pencil marks as guidance.
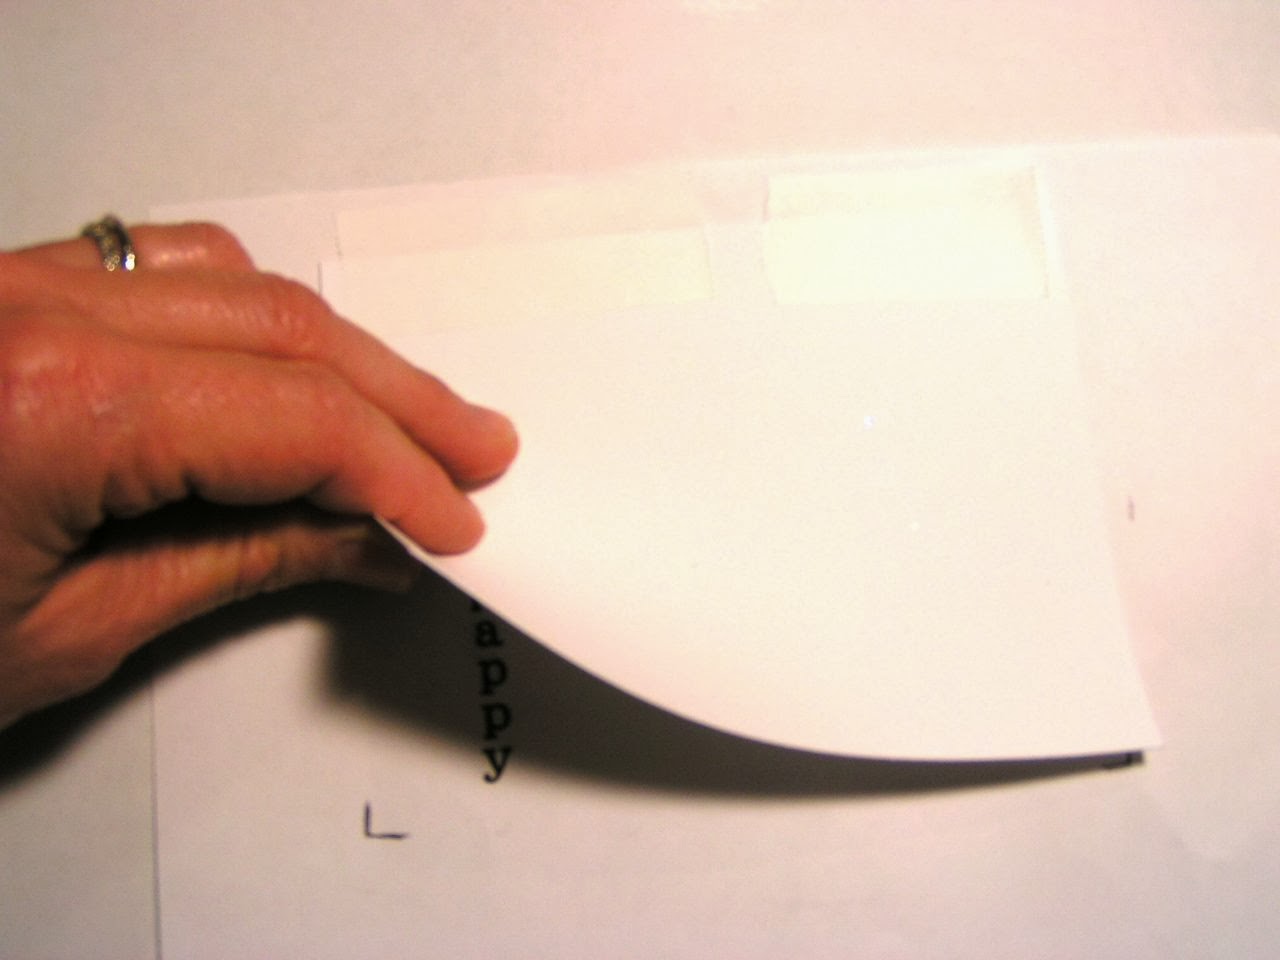
Reinsert the paper into the printer so it will print onto the white cardstock. Print with standard ink settings.
Step 4: Assemble Card
Glue all the pieces and layers in place with the Best Glue Ever™.
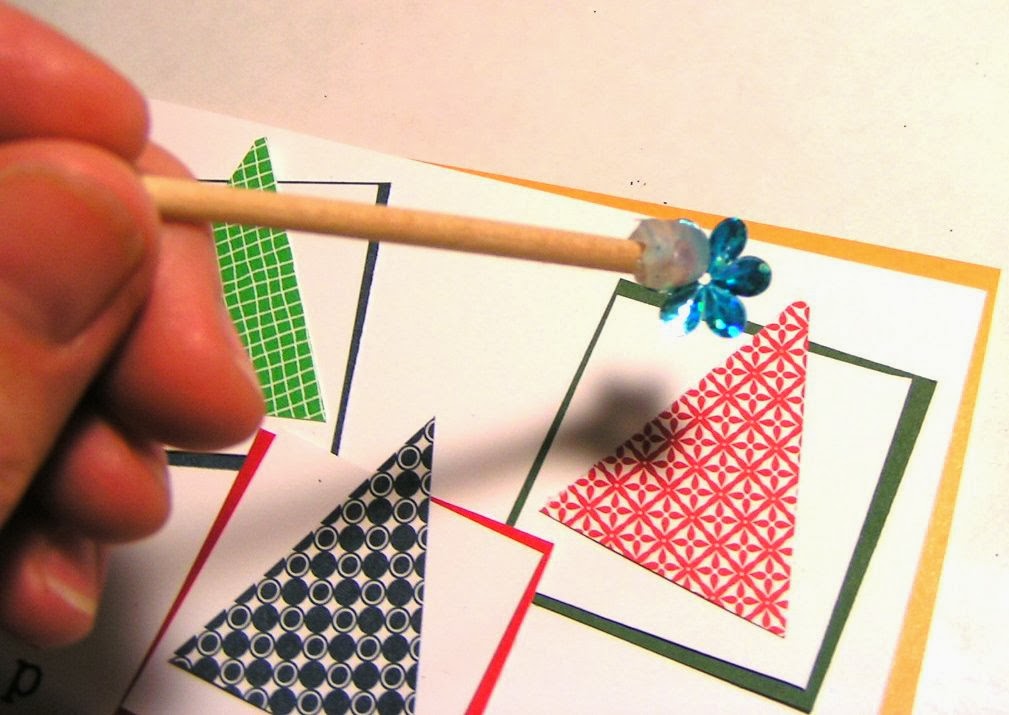
Step 5: Apply Hat decorations
This is the fun part! Choose buttons, confetti, punch shapes, flowers, brads, etc! Use Embellie Gellie to pick up and precisely place embellishments–especially if you add teeny-tiny stuff, and the Best Glue Ever™ to embellish them with glitter, flock or other sparkly bling before adhering them to the card.
Step 6:
Sign and Date the back of your card:) Slip into the matching envelope and mail.
OPTIONAL: Instead of using white cardstock for the overlay, use vellum. See tips (below) for working with vellum.
TIPS
Buy packs of any occasion cards when on clearance, at garage sales or at Goodwill. These typically offer quality paper stock and perfectly sized envelopes. It doesn’t matter if it says Get Well or Happy Retirement because you will be altering them!
In step 2, use “draft” setting when finalizing word placement will save ink. Also, keep using the same piece of paper– inserting it in different ways to save paper.
Use solvent ink pads to change the color of buttons. Hold the buttons with Embellie Gellie to keep fingers ink-free while rubbing button onto ink pad. (Clean your hands with The Best Cleaner Ever™.)
Remember to add extra postage if you decide to make your cards square per US Postal Service regulations
Vellum:
Pre-treating the optional vellum overlay with ScraPerfect Perfect Crafting Pouch™ is highly recommended for perfect, bold, crisp printed results without smearing.
Here are two methods for adhering vellum invisibly with the The Best Glue Ever™
Apply the glue in a very thin layer to the entire piece of vellum. It will dry quickly–but make sure it is perfectly clear before pressing the vellum onto the cardstock.
Apply glue to the vellum only where it will be hidden by photos, paper, stickers, flowers etc.

