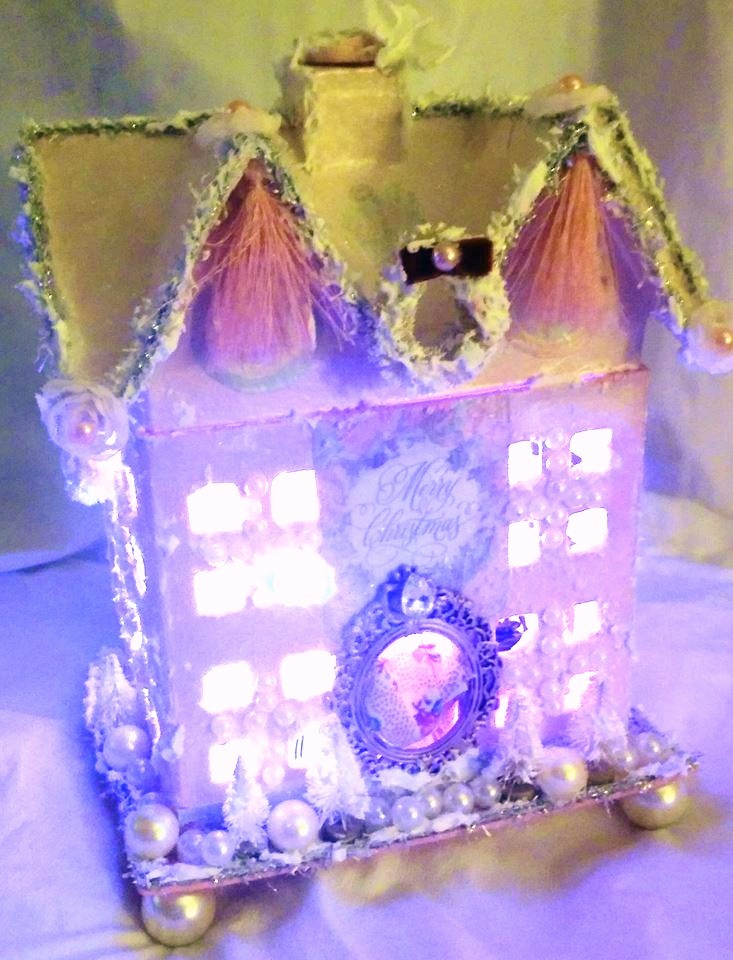
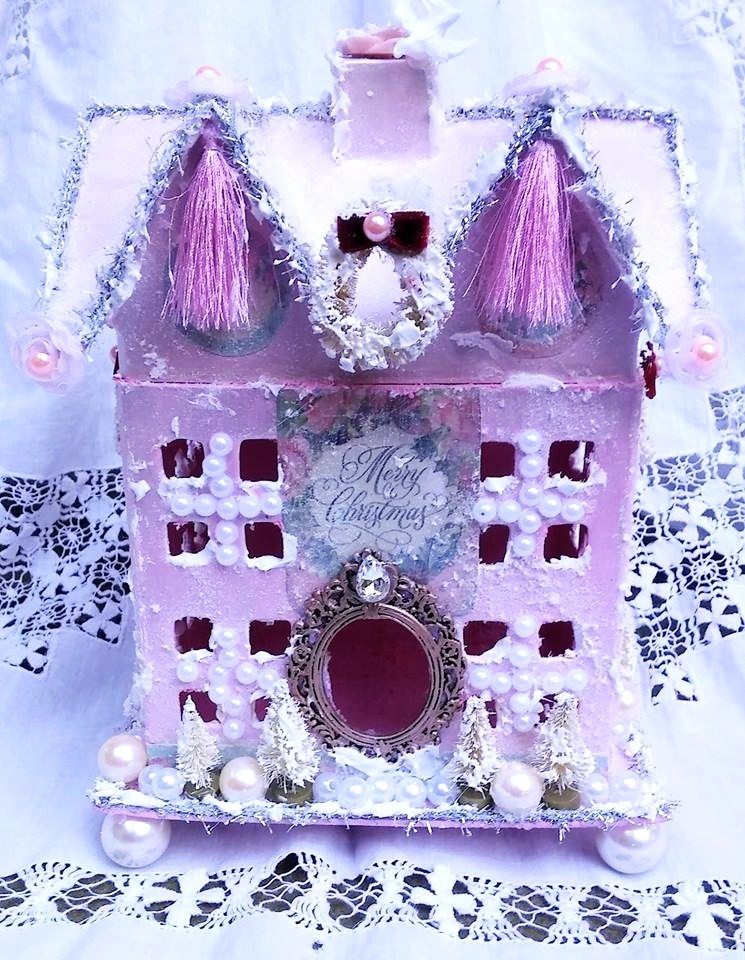
Hi there! Kim here today sharing a winter project that is very close to my heart. I transformed a paper mache house into a winter cottage with the amazing family of products by ScraPerfect. These take a lot of work and time, so this was completed in stages, with lots of drying time in between layers. This is my third house I’ve worked on recently and I am quickly getting hooked. This one was done in a shabby chic and roses theme, I hope you like it!
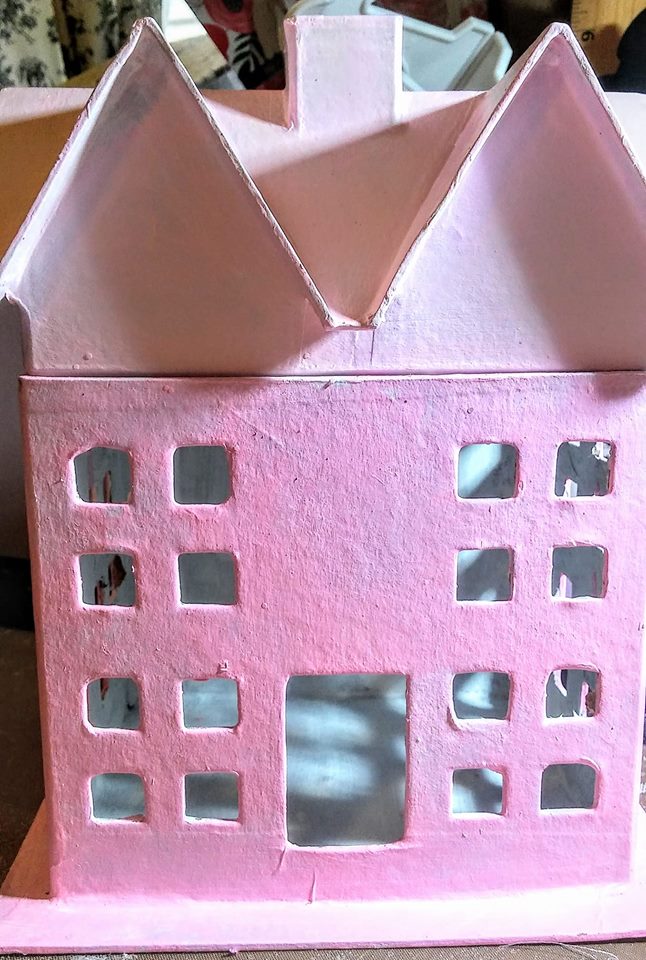
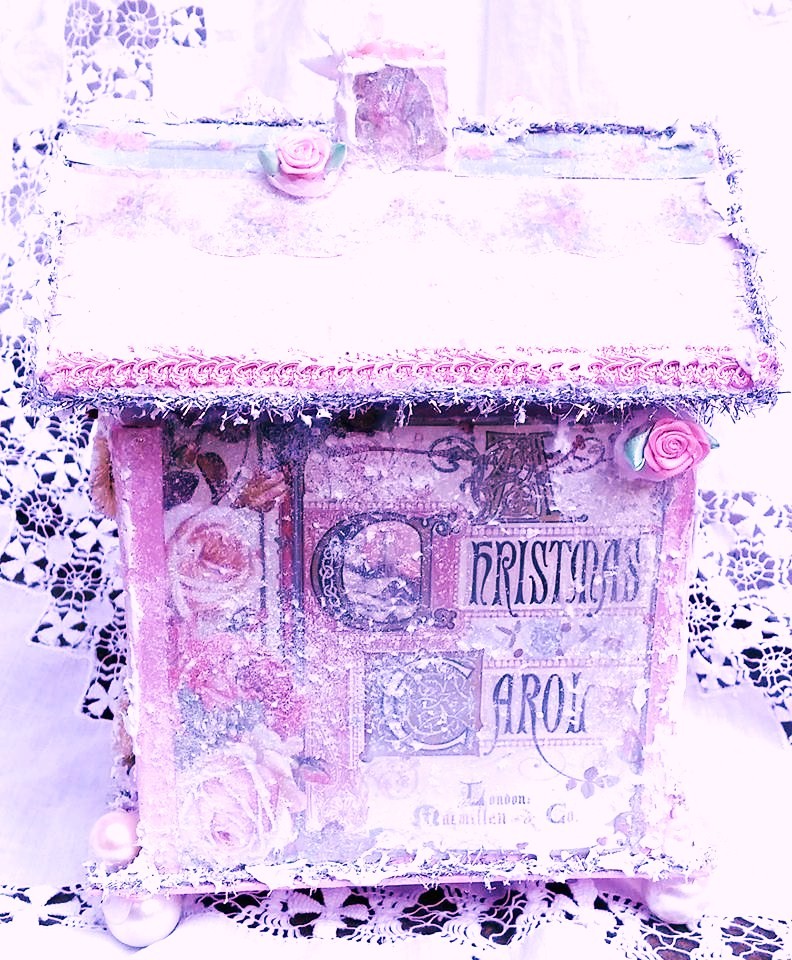
To begin, I gave the entire cottage (inside and out), 2 coats of white gesso and let dry and then 2 coats of acrylic pink paint. I used two different shades of pink for contrast. While the paint was still wet, I sprinkled a snow mixture (shredded plastic snow and fine glitter) lightly over most parts of the cottage. Then, I got out my paper pad and began fussy cutting pieces that I wanted on my cottage. I used paper by Stamperia from the Sweet Christmas line as it went with my shabby chic theme and had lots of roses.
I used the
Best Glue Ever on the back of my paper in small dots to attach the paper to the cottage. It is truly THE best glue for paper and sticks so quickly! I want this creation to last for decades, so I wouldn’t trust any other adhesive. When using the
Best Glue Ever, I always have the large
No Clog Writing Cap on my bottle and recommend you do the same. It prevents from using too much glue and provides ease in precision work.
After adhering all of the paper pieces, I covered them with some Mod Podge Pearl for a shimmery effect. Then, I got out my embellishments and went to town! The smallest details make this cottage special. I also used the
Best Glue Ever to secure small bottle brush wreaths and trees. For these heavier pieces, I waited for the
Best Glue Ever to become clear before adding the embellishments. On the wreaths, I used
Embellie Gellie to place a tiny flat back pink pearl in each center, and the
Best Glue Ever to attach to the velvet bows on each wreath.
I also used this awesome combination from
ScraPerfect to adhere lots of tiny, white flat back pearls around the center of the cottage windows for some extra embellishment.
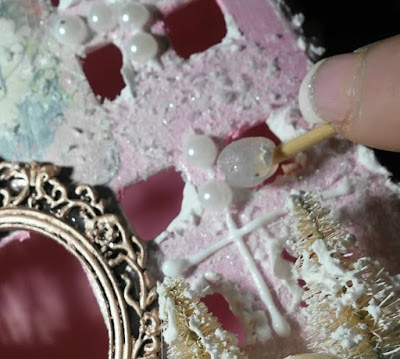
Larger pearls were also secured around the base of the cottage to look like snowballs with the
Best Glue Ever in addition to the bottom of the cottage to serve as feet. With these larger pearls, I also waited a few minutes before setting the pearls in. Smaller white pearls were added for smaller snowballs. At this point, I glued some Tim Holz silver tinsel around the architectural lines of the cottage. I used a small, thin line of the
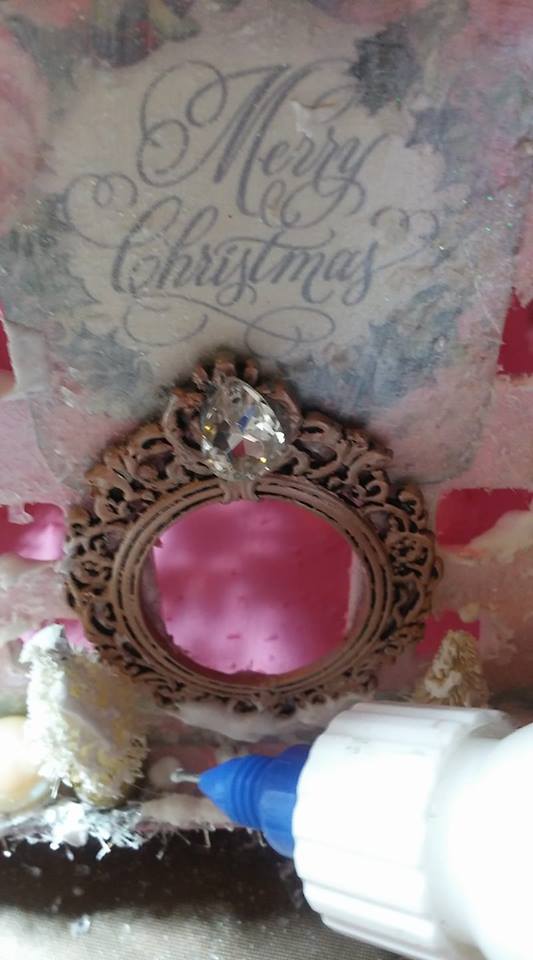
Best Glue Ever for this and for some pink braided trim. I wanted to add some extra pizazz to the front door of my cottage, so I used a metal frame as my door after I rubbed a coat of Rose Gold Metallic Lustre over it with my fingers. Because of it’s weight, I applied lines of the
Best Glue Ever on both the frame and the cottage for maximum bond. I attached a tear drop shaped crystal to the frame also. I love the way it turned out!
My cottage was now ready for some more small details. Using the
Best Glue Ever, I added some resin roses, a couple of rosette trim pieces, a white dove, a few ribbon roses, and some pink tassels. My last step, was to use a small flat spatula to add Aleen’s True Snow to numerous places on and around my winter cottage. I let this dry overnight. I used the
Best Cleaner Ever on my hands once I was finished, and it got all of the dried adhesive, snow, and glitter off super fast. That is always by last step now for all of my crafty endeavors. Here is another look at my completed winter cottage:
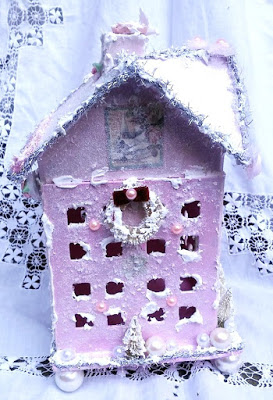

The other special feature that makes my winter cottage special is that it is lighted. I painted the inside of the cottage pink for this reason. I would use pink battery operated lights for lighting the inside of the cottage. I didn’t have pink, so here is what it looked like with white led lights. This cottage will be a gift for some special friends that are artisans, and I can’t wait to see how they like it, especially all lit up!
Thank you all for stopping by today and bearing with me on this long post. Please check back here often as there is fabulous inspiration provided by some very talented designers every day. Also go to
ScraPerfect to get your must have products and to follow on social media. I will be be back later in the month with one more creation to share.
Until Next Time,
Kim Lippincott