
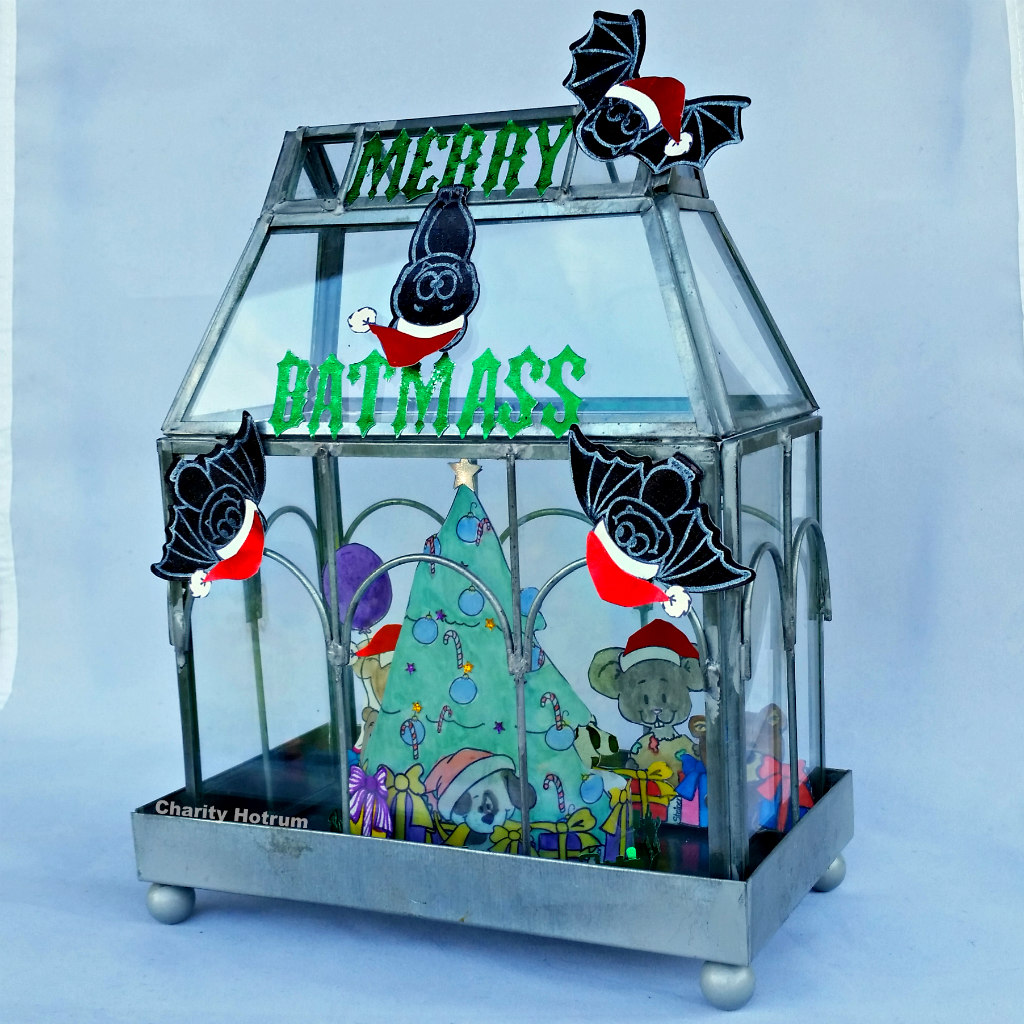
Charity here with a how-to for a bright, cheery party in a bathouse. When Gerda Steiner Designs came out with their bat stamp and die set I knew I HAD to have them. Aren’t they too cute for words with their little Christmas hats and goofy smiles? If you follow me at all on Facebook you know that I am 100% Bat-Crazy! I think these winged, furry, fruit and insect eaters are amazing.
~ Merry Batmass ~

Gerda Steiner Designs also has delightful digi-stamps and printables. I downloaded the free Christmas Tree, a couple of cute little mice, and of course the Christmas Hats. With help from ScraPerfect products my Merry Batmass Party is a success!

My tiny glass house looks like a cathedral with a soaring roof and arched windows. I decided to run with that theme and turned it into a battery operated candle holder. I also spelled my title with the church idea in mind. If you look closely you can see the glow behind the tree!
Directions:
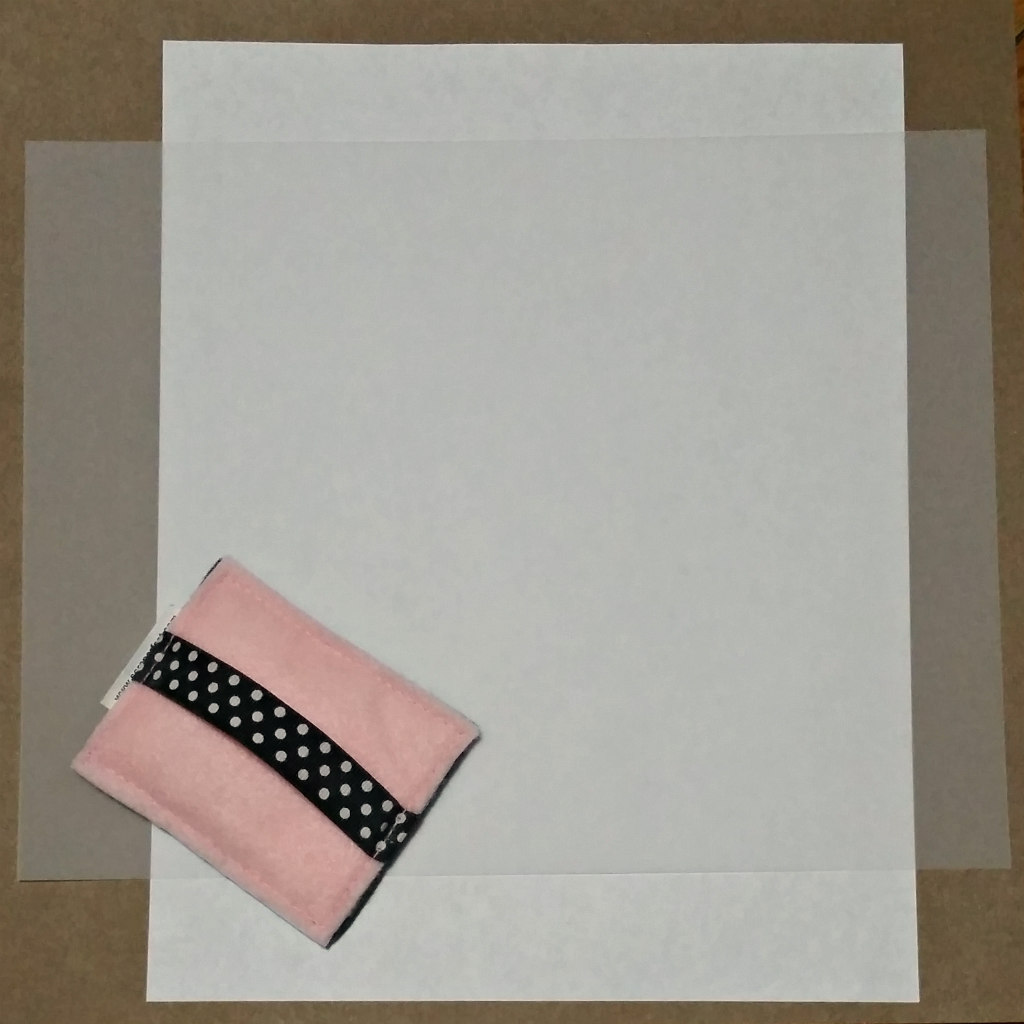
Step 1:Prep vellum for printer.
I used the Perfect Crafting Pouch from ScraPerfect to dust the vellum so the ink would set without smears.
I used the Perfect Crafting Pouch from ScraPerfect to dust the vellum so the ink would set without smears.
Step 2:Prep vellum for painting.
After printing my digi stamps I dusted the back of the vellum to prep for watercolors.
After printing my digi stamps I dusted the back of the vellum to prep for watercolors.

Step 3:Paint printed design from the back.
Painting the vellum from the back of the design mutes the colors and adds to the glow of the candle design. The watercolors left the vellum rather warped. I cut out the tree and wrapped it around a paper towel tube to reform.
Painting the vellum from the back of the design mutes the colors and adds to the glow of the candle design. The watercolors left the vellum rather warped. I cut out the tree and wrapped it around a paper towel tube to reform.

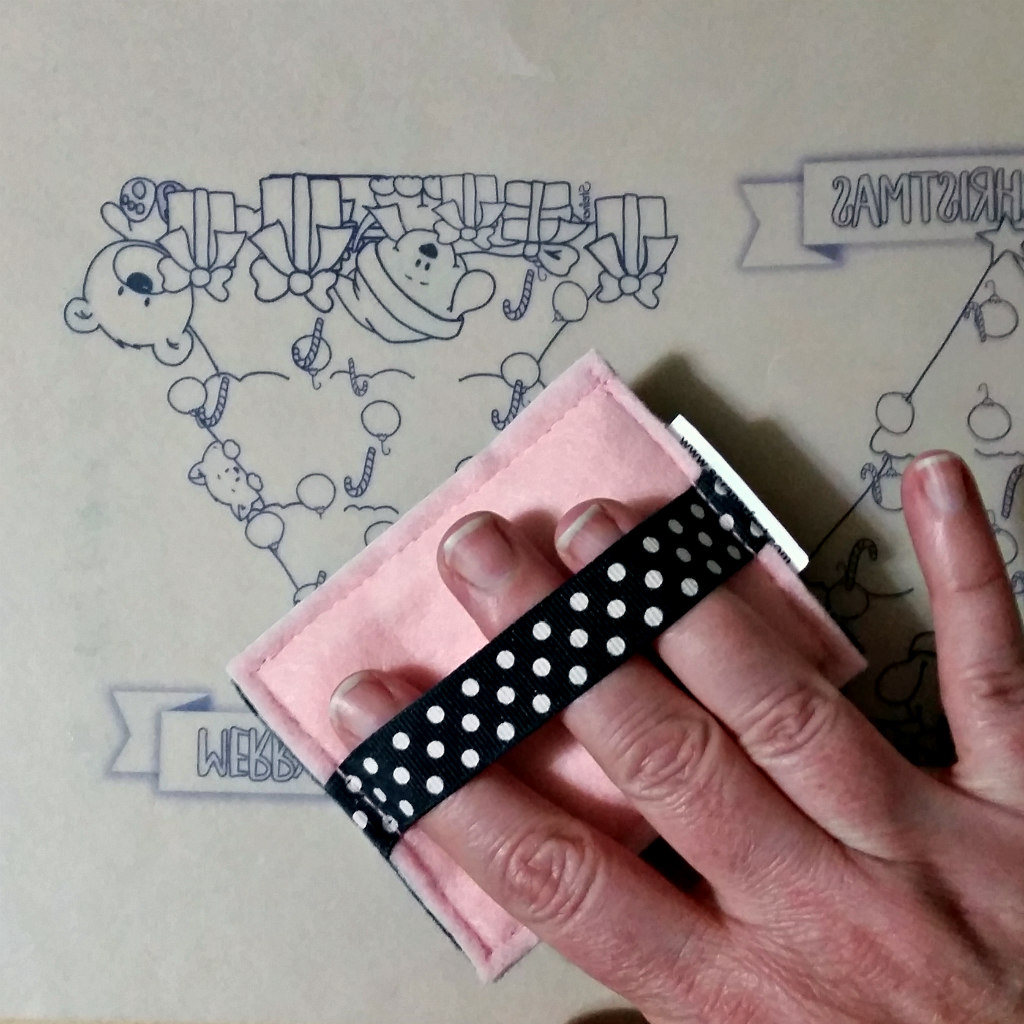
Step 4:Stamp and cut Batmass Angels.
My Batmass Angels were super easy to make. I used white pigment ink and Rinea Ebony Starstruck Foiled Paper. The bats cut out perfectly with the stamps and matching dies from Gerda Steiner Designs.
My Batmass Angels were super easy to make. I used white pigment ink and Rinea Ebony Starstruck Foiled Paper. The bats cut out perfectly with the stamps and matching dies from Gerda Steiner Designs.
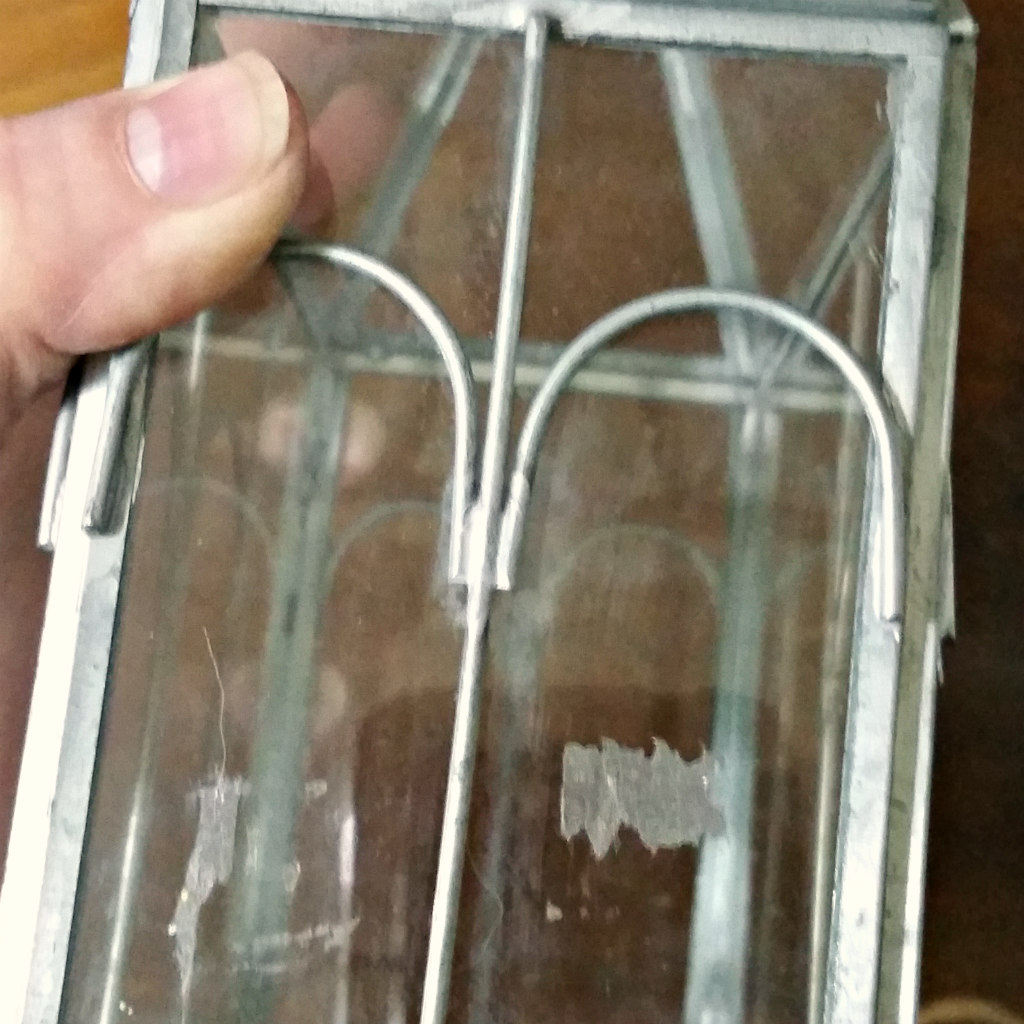
Step 6:Clean glass house.
My tiny conservatory is a thrifted item and it was FILTHY!
My tiny conservatory is a thrifted item and it was FILTHY!
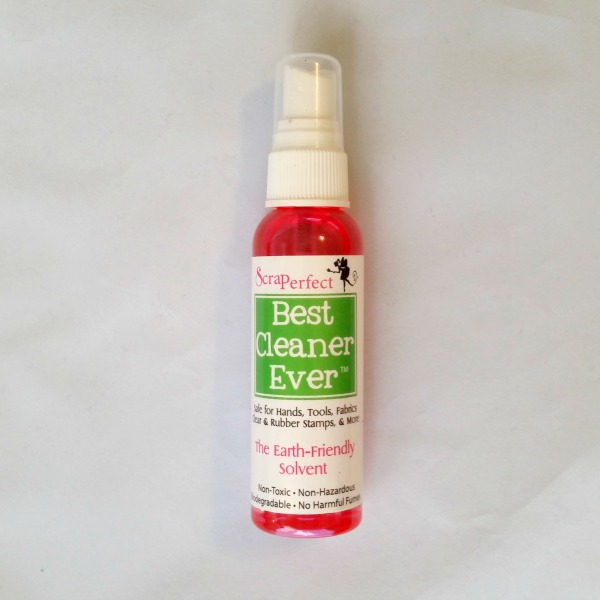
I used the Best Cleaner Ever from ScraPerfect to remove the sticker and tape residue marring the glass.
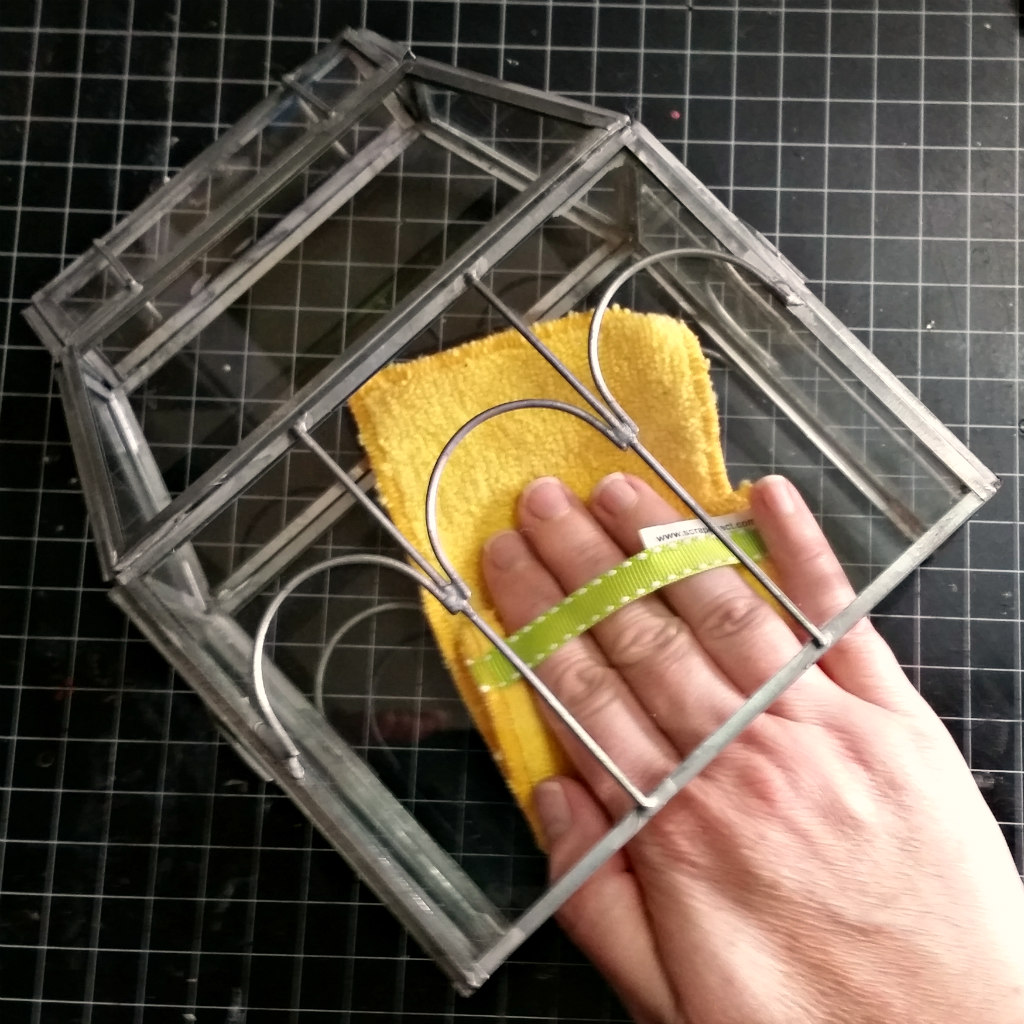
Step 7:Polish glass house.
After I washed it up I cleaned the fingerprints and water spots using the Perfect Cleaning Cloth. My little glass house looked brand new!
After I washed it up I cleaned the fingerprints and water spots using the Perfect Cleaning Cloth. My little glass house looked brand new!

Step 8:Add presents and party guests.
I had printed out and colored or painted the advent calendar several times. I used my extras for these cuties in the back. I fussy cut them and used foam tape to adhere them to the glass. The cookie mouse and balloon mouse are thrilled to be in on the party!
I had printed out and colored or painted the advent calendar several times. I used my extras for these cuties in the back. I fussy cut them and used foam tape to adhere them to the glass. The cookie mouse and balloon mouse are thrilled to be in on the party!
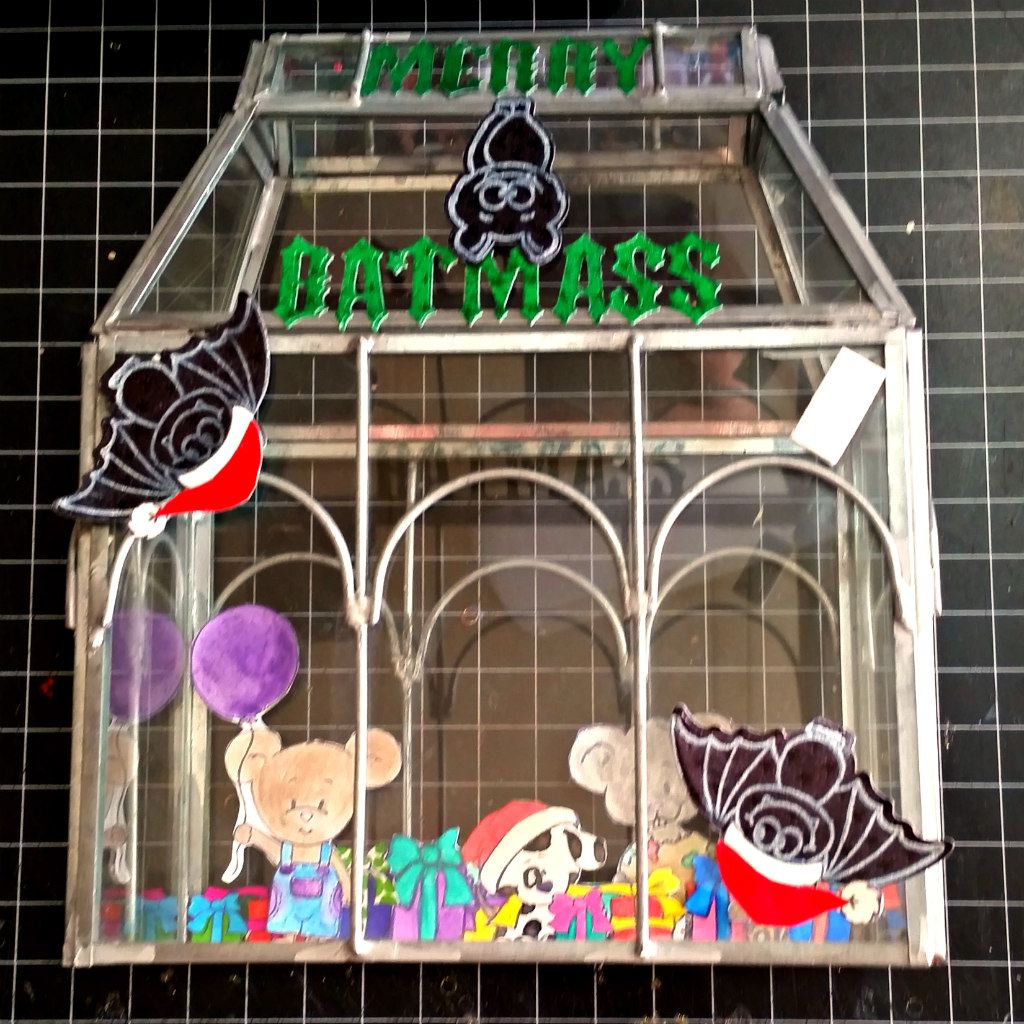
Step 9:Cut and attach title, bats, and hats.
I used Emerald Foiled Paper and a Gothic alphabet die for the title. The Christmas Hats are printed on white cardstock with a bit of Ruby Foiled Paper pieced in the middle.
I used Emerald Foiled Paper and a Gothic alphabet die for the title. The Christmas Hats are printed on white cardstock with a bit of Ruby Foiled Paper pieced in the middle.
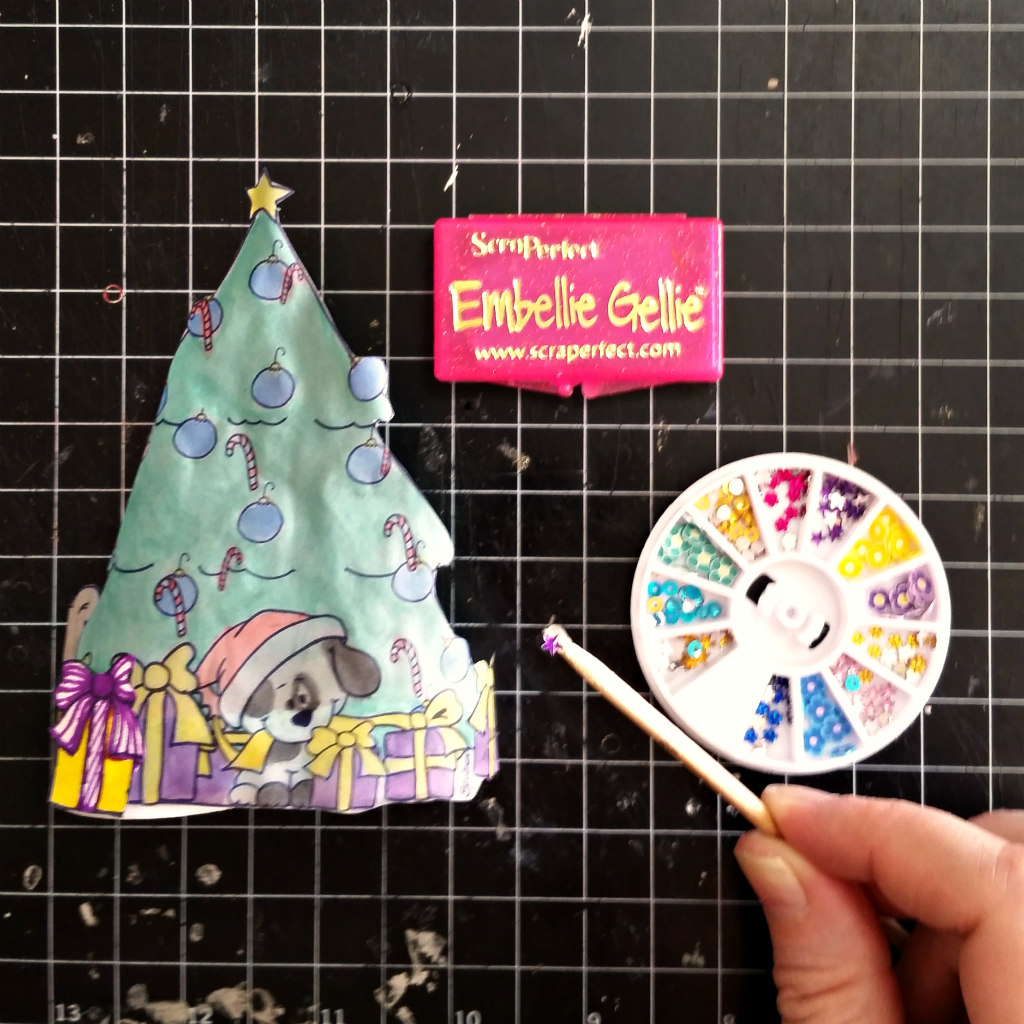
Step 10:Attach tree to battery candles, add bling.
The tree needed a bit of sparkle to it. I used Embellie Gellie to pick up tiny star shaped gems for my tree. This wheel of gems is a Hot Buy for a limited time at ScraPerfect.
The tree needed a bit of sparkle to it. I used Embellie Gellie to pick up tiny star shaped gems for my tree. This wheel of gems is a Hot Buy for a limited time at ScraPerfect.
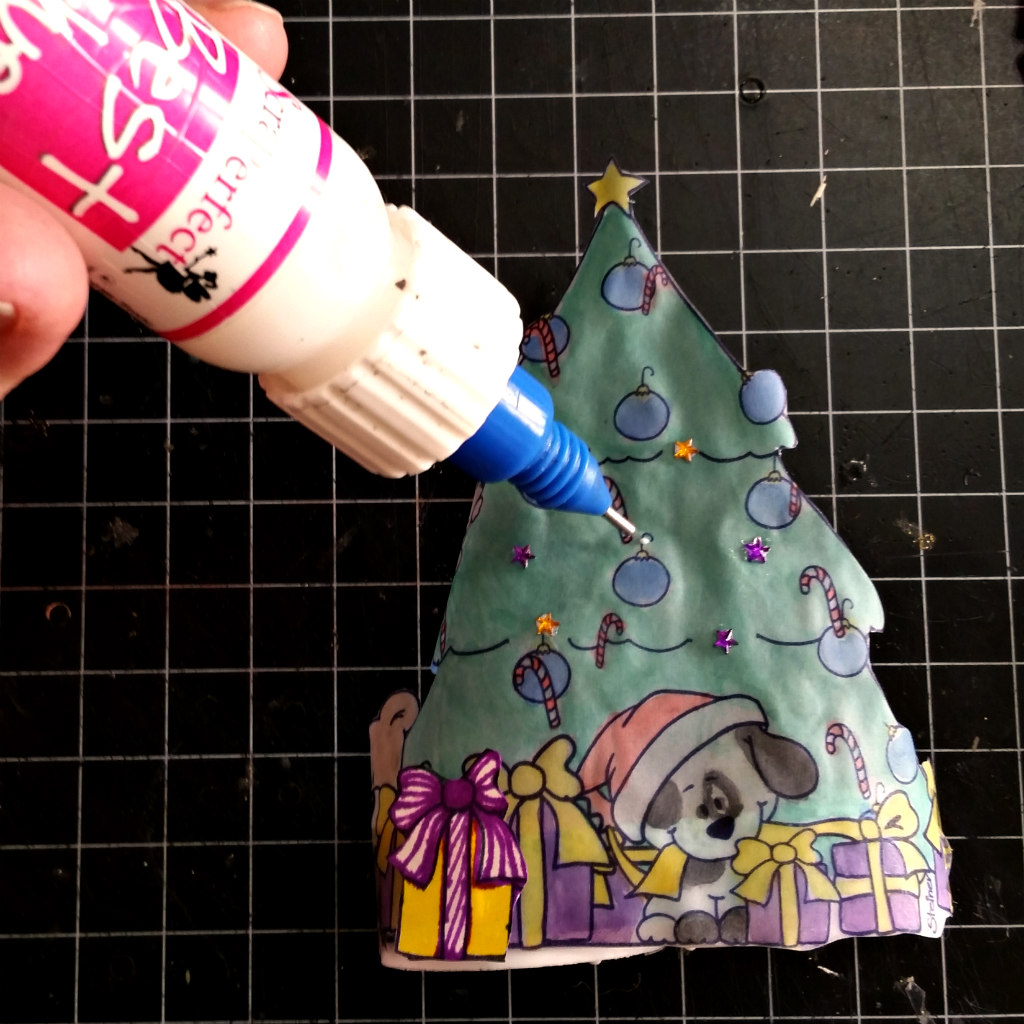
One dot of Best Glue Ever holds the bling to the tree.
The tree is taped around two battery operated candles that give the tree support and shape.
Step 11:Turn candles on and position tree in center of glass house.
The Batmass Angels are so excited to have the kids over for a Christmas Party! There is a lovely tree and presents galore. I hope you have enjoyed this little piece of fantasy.
Stop by my blog Scrappin’ Chaos for a links to the digi-stamps I used.
The Batmass Angels are so excited to have the kids over for a Christmas Party! There is a lovely tree and presents galore. I hope you have enjoyed this little piece of fantasy.
Stop by my blog Scrappin’ Chaos for a links to the digi-stamps I used.
Scrap On!
~charity~

